Taping for Posterior Tibialis Tendon Dysfunction (PTTD)

Pain along the inside (medial) portion of your ankle is often due to Posterior Tibialis Tendon Dysfunction (PTTD), also known as posterior tibial tendon syndrome or tibialis posterior syndrome, and it can be very difficult to treat.

The posterior tibialis muscle is a particularly important muscle in runners as it is used in plantar flexing the ankle (pointing the ankle/toes downward) and inverting the ankle (rolling it inward).  More importantly, its role is to support the arch of the foot. Injury to this muscle is common in runners as well as those who play sports involving high foot impact such as basketball. It can be associated with a fall or can generally develop overtime depending on your risk factors and the strain your foot has taken. (Please refer to 9 Tips to Self-Treat Posterior Tibialis Pain.)

In this video, I demonstrate a taping technique for supporting the arch and the bottom of the foot for those suffering from PTTD. (I recommend using KT TAPE.)

CLICK HERE TO WATCH NOW

PTTD most commonly starts out as an over use injury. Although more common in runners and those who are involved in high impact sports, this condition can affect anyone. If the condition is left untreated, the end result is usually a falling of the arch which causes adult acquired flatfoot. When this condition is caught early, it can be self-treated. Once the arch has fallen, surgery would most likely be indicated.

If you’re interested in more thorough guide along with other videos on how to self-treat lower extremity injuries and pain like PTTD, check out the Resilient Runner Program. This is the perfect guide to help you take control of your health and fitness as well as self-manage common aches, pains, and injuries. Even if you’re not a runner, this program is appropriate for those who love to stay active and want to enjoy a healthy lifestyle.

In case you haven’t already, be sure to subscribe to my e-mail list and YouTube channel as well as join our community on Facebook by following The Physical Therapy Advisor!

How to Self-Treat Knee Pain

Knee pain is a common complaint among exercisers and non-exercisers alike. So often the actual cause of the knee pain is actually a muscle imbalance elsewhere. Weakness in the hip musculature, particularly the deep hip external rotators muscles, is a common contributing factor for knee pain.

In the following videos, I demonstrate different exercises designed to specifically strengthen your hip and lower leg in order to address muscles imbalances common with knee pain. Addressing these muscle imbalances can lead to the permanent resolution of your knee pain and symptoms.

My Top 3 Videos to Self-Treat Knee Pain:

The Clamshell: A “go to” Exercise for Treating Foot, Hip, and Knee Pain – The clamshell exercise is a commonly prescribed exercise designed to target the hip abductors and hip external rotators. However, this exercise is often performed incorrectly or ineffectively. In this video, I demonstrate my preferred method of performing the clamshell exercise in order to insure optimal effectiveness.

How to Use the Clamshell Hip Exercise to Treat Knee Pain – Knee pain is the most common running related injury. The root cause of many of the most common knee related issues is hip weakness. One of the best ways to treat many common running aches and pains is to focus on strengthening these muscles which include the gluteus medius, the tensor fascia latae, and the other deep hip rotators. In this video, I demonstrate how to perform the clamshell exercise. It’s an excellent non-weight bearing exercise to work on hip rotator strength which will directly affect knee stability.

A Barbell Knee Stability Exercise for Runners – In this video, I demonstrate how to perform an advanced exercise known as the clock or star drill. It’s an excellent exercise to work on knee stability and balance while specifically focusing on quadriceps and hip strength.

If you’re interested in more thorough guide on how to self-treat knee pain, check out the Resilient Runner Program. This is the perfect guide to help you take control of your health and fitness as well as self-manage common aches, pains, and injuries. Even if you’re not a runner, this program is appropriate for those who love to stay active and want to enjoy a healthy lifestyle.

I WANT TO BE RESILIENT!

If you have a question that you would like featured in an upcoming video or blog post, please comment below or submit your question to contact@thePhysicalTherapyAdvisor.com. In case you haven’t already, be sure to subscribe to my e-mail list and YouTube channel as well as join our community on Facebook by liking The Physical Therapy Advisor!

7 Strategies to Renew Your Health

I often hear others comment, “It’s too late to make a change now. I’m too old!” Worse yet, so many people actually believe that, but I don’t! I believe that it is never too late to change. You are never too old or out of shape to make improvements and renew your life. Being healthy and aging well is not a single choice to be made once and then never re-visited. It is a series of constant choices that add up to a way of living and constant renewal.

Aging well encompasses all of the following aspects of our being: physical, mental, emotional, and spiritual. It also includes the community around us. This year, choose to make small consistent choices to renew these areas of your life. This will make all of the difference in aging well. Each person’s physical journey as he/she ages is different. Taking consistent and appropriate action now can vastly change future outcomes.

7 Strategies to Renew Your Health: 

Walk more!

Walking is one of the most fundamental activities we perform as humans. Research is very clear that frequent movements (like walking) are the key to avoiding many chronic conditions. Walking lowers your risk of Alzheimer’s disease, heart disease, stroke, and diabetes. It can lower blood sugar levels when performed directly after meals. Elevated blood sugar levels are a major contributing factor to excessive internal inflammation which is associated with most chronic illnesses. Walking can also be an essential component in psychological well-being. Walking as exercise and generally walking more during the day should be considered the first line defense in slowing the aging process and maintaining functional independence.

Embrace fashion.

The first step in adopting a new healthy behavior is to envision and feel what it would be like as if you had already adopted that new behavior. This allows your brain an opportunity to already feel what it would be like to make a change without fully doing so. This can be very motivating. Investing in gadgets or new work out attire, including new walking shoes, can be both motivating and fun. Get in the mindset of adopting the new behavior. Envision how you will look and feel once you have made the changes. Then go for it!

Take control.

There is nothing more important than your health. You have control over most of the aspects in your life that affect your health and well-being. Take charge, and empower yourself. You must be your greatest advocate. Western medicine is designed to keep you alive, not to help you thrive. Taking a passive role in your health is not a wise choice in America’s current health care environment. Only you are responsible for your health. Decisions now will determine how successful you age in the future.

Make the decision.

Research on willpower has shown that it is a finite resource. We actually use up our willpower during the day and have to replenish it daily. This is why you are more likely to “fall off the wagon” later in the day rather than earlier. Decide on the change and commit to the decision. Then implement structure to your day that causes the behavior to be more automatic. Therefore, eliminating the need to rely solely on willpower.

Maintain your strength.

Although all muscle fibers decline some as you age, the fast twitch (Type II) fibers show the most declines. Some loss of strength is anticipated as you age. Losing strength to the point of complete debility or loss of mobility and independence is not a normal aging process.

Strength training is a critical component to maintaining and growing additional Type II muscle fibers. The stronger you are, the more resistant to injury you are. You are more likely to maintain proper functional mobility. Also, strengthening of the core area (the abdominals and back extensors) helps to manage low back pain.

Perform high intensity training (HIT).

The research on the effectiveness of HIT continues to grow. Even more impressive are the findings that HIT can be safely performed at any age and with almost every medical condition. It is now even being implemented in many progressive Cardiopulmonary Rehabilitation Programs, where people are recovering from all kinds of cardiac and pulmonary disorders such as COPD, heart attacks, and heart valve replacements.

Perform your cardio activity in short bursts (ranging from 30-60 seconds at a time) followed by a one to two minute recovery. The 30-60 seconds should be at a high intensity, meaning your rate of perceived exertion (RPE) is high. You should be breathing heavy. Accommodations can be made for almost any type of medical condition. For example, HIT may be performed while using a stationary bicycle, an upper body only bicycle, a rowing machine or in the pool. You can also walk uphill at a quick pace, then stop and rest. The point is to get your heart rate up, and then bring it back down for a full recovery prior to repeating.

If you feel unsure as to how to safely perform this type of training, please seek the help of a competent cardiopulmonary trained physical therapist or exercise physiologist.

Get started!

Make 2022 your year to renew your commitment to make the necessary changes that will empower you to age well. Most importantly, just get started! It’s never too late to maximize your health and well-being in 2022 by implementing these 7 strategies.

Which strategy can you implement in order to age well in 2022? Please leave your comments below.

Thank you for supporting The Physical Therapy Advisor! I look forward to serving you in 2022! If you have a question that you would like featured in an upcoming blog post, please comment below or submit your question to contact@thePhysicalTherapyAdvisor.com. In case you haven’t already, be sure to subscribe to my e-mail list and YouTube channel as well as join our community on Facebook by liking The Physical Therapy Advisor!

A Year in Review: 2021

The COVID-19 pandemic and the events of the past two years have impacted all of us. Through this hardship, we have learned the importance of working together and being proactive in taking control of our own health and well-being. Working together and supporting one another makes taking the necessary steps to age well easier and more fulfilling. Being proactive is a key component to aging well.

The purpose of The Physical Therapy Advisor is to help people like you to take control of your health and to save money by learning how to safely self-treat and manage common musculoskeletal, neurological, and mobility related conditions safely and effectively.

A recap of my top 3 posts that resonated with you the most in 2021 include:

Fitness Exercise Won’t Help Your Low Back Pain – With so many active individuals and crazy fitness trends you would think that all of this exercise would actually help reduce low back pain, right? Wrong…It turns out that not all exercise (and especially, not all “core” exercise) is created equally. Learn how to safely self-treat your low back pain through movement and exercise as well as some helpful methods for a speedy recovery.

Want Stronger Hips? Do This – Learn how to perform a unique and advanced exercise designed to specifically strengthen your hip and lower leg in order to address common muscles imbalances found in the hip musculature. In this video post, I demonstrate a different version of the monster walk using an assistance band. This is an excellent exercise for hip strengthening.

How to Fix a Crack in your Heel – Worrying about a crack in the skin of your heel might seem a bit odd since cracks are quite common. However, they are painful and can become infected so they need to be taken seriously. Discover the risk factors for a cracked heel and how to self-treat it.

As 2021 comes to a close, more and more people are realizing the value of taking control of their health care and personal well-being. In today’s health care environment, we all need to learn how to treat common aches and pains proactively instead of reactively. We must truly focus on health and wellness care for ourselves, loved ones, and friends. Together we all can age well.

Thank you for supporting The Physical Therapy Advisor! I look forward to serving you in 2022! If you have a question that you would like featured in an upcoming blog post, please comment below or submit your question to contact@thePhysicalTherapyAdvisor.com. In case you haven’t already, be sure to subscribe to my e-mail list and YouTube channel as well as join our community on Facebook by liking The Physical Therapy Advisor!

Simple Guidelines for Treating Low Back Pain

Did you know that low back pain (LBP) affects nearly 80% of the US population at one time or another? It is one of the most prevalent medical conditions in the United States and one of the most common reasons why people miss work. However, in MOST cases, LBP is not a sign of a serious life-threatening condition. Only approximately 3% of serious pathology cases report low back pain as a symptom.

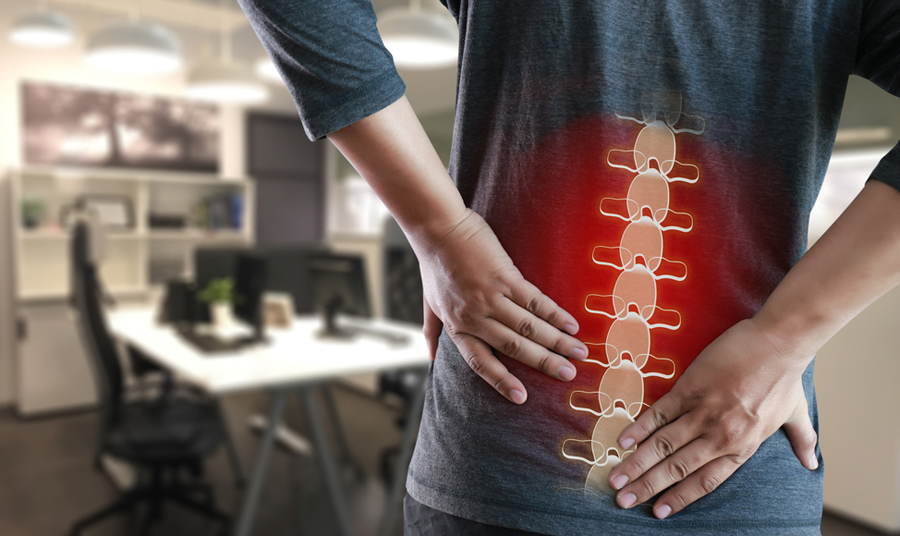
While most LBP is not serious, it can be very painful and have a significant impact on your mobility and quality of life. The good news is that you can follow simple guidelines to navigate an episode of LBP.

To safely self-treat your low back pain, first take a moment to assess your symptoms and pain level. What led to your pain and/or injury? Did the pain come on suddenly or slowly? Evaluate the severity of the injury. If you’re experiencing any of the following, please seek immediate medical attention:

  • Loss of bowel/bladder function.
  • Uncontrollable pain. The pain is so severe you cannot function or move.
  • You are losing muscle function or control. The muscles in the legs will no longer work. (This is different than pain preventing the muscle from working.) This sensation of paralysis occurs when the muscles will not actually function.
  • Significant loss of sensation in the leg or groin area. This is not a tingling sensation, but an actual loss of sensation. For example, you cannot feel the toilet paper when you wipe after using the toilet.
  • Onset of pain without any known mechanism for the injury. (Thoroughly consider your activity. Many times, a slow onset of pain begins several hours after performing an activity.)

Simple Guidelines for Treating Low Back Pain:

Opt for conservative care

Most episodes of LBP improve quickly with conservative care. Research has effectively shown that early intervention with physical therapy is more cost effective, improves long-term outcomes, and decreases downstream health care dollars spent in unnecessary imaging and treatments. Unfortunately, the longer persistent LBP is ignored, the more fearful a person can become. This fear leads to decreased mobility which only makes the episode worse.

Surprising to many, but imaging does not correlate well to the causes of LBP. Worse, it often induces fear. The use of imaging is to rule things out. Negative imaging is good news! If your symptoms don’t match what is found on imaging, then more than likely that is not the cause of the pain you are feeling.

Keep moving

Exercise and movement in all directions is safe and healthy for the spine, even when it hurts! If you have LBP, move. If it is painful, modify and try moving again.

When your back hurts, aim for neutral posture to minimize any strain. Spine posture during sitting, standing, and lifting does not predict LBP or its persistence very well.  However, improper posture in sitting, standing, and lifting can increase shearing, torsion, and loading on structures. Avoid putting an excessive load on irritated tissues which can certainly exacerbate an already sore back.

Fortunately, most LBP is mechanical–meaning it is from a physical or structural cause and isn’t related to conditions such as cancer or infections. Most LBP will have a directional preference for extension. A majority of injuries occur when performing a forward biased (flexed movement) like chronic slouching or a spinal flexion biased movement. For discussion purposes, I will be addressing an extension biased program.

With mechanically driven low back pain, you should be able to alter and change your LBP within a short period of time. First, establish a directional preference by identifying a pattern to the pain. Does the pain get worse when you bend over or does it improve? What happens when you repeat this movement?

Determine how your pain responds. If it spreads away from the spine and down into the leg, beware that you are moving in the wrong direction. Stop that particular movement, and instead try flexion biased movements. In my experience, most episodes of LBP tend to respond better to extension biased movements. If flexion or extension doesn’t help or change the pain in any way, then you may need assistance from a medical provider.

The rule of thumb for movement: If the pain worsens by spreading peripherally down the buttock and into the leg and/or foot, then the condition is worsening. We must stop that activity. If the pain centralizes and returns back toward the spine (even if the pain worsens slightly), then keep moving as the condition is actually improving.

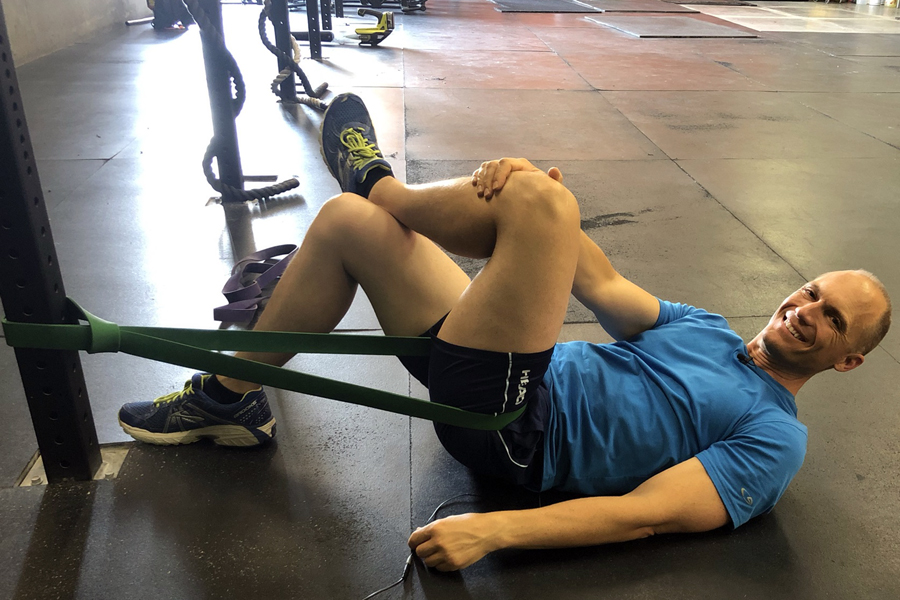
Strengthen your core muscles

Your core is likely not what you think it is. Weak abs do not cause LBP. However, poorly coordinated pelvic musculature can precipitate and perpetuate LBP.  Stop performing sit ups and start learning how to truly activate and strengthen the muscles of the inner core. Watch now as I describe what really the “core” is and why it matters. CLICK HERE

Constant low back pain can result from chemical inflammation to sensitized or damaged tissues. Intermittent pain is more often mechanical. Understand that medications are useful for helping reduce chemical inflammation, but addressing mechanical factors as well will lead to a quicker (and long term) recovery in most cases.

Unfortunately, low back pain will re-occur almost 90% of the time. To ensure a complete recovery from an episode and to help prevent re-occurring episodes, address other contributing areas such as the upper back (thorax) and your hip mobility. Typically, there is weakness in the deep stabilizing muscles known as the multifidus muscles. In the presence of LBP, these muscles will reflexively shrink, weaken, and lose function. Without proper rehabilitation, the muscles will not fully recover. This increases the risk of future episodes because the spine no longer has the ability to stabilize itself normally. Not all “core” work is created equally, so the strength of these muscles should be addressed.

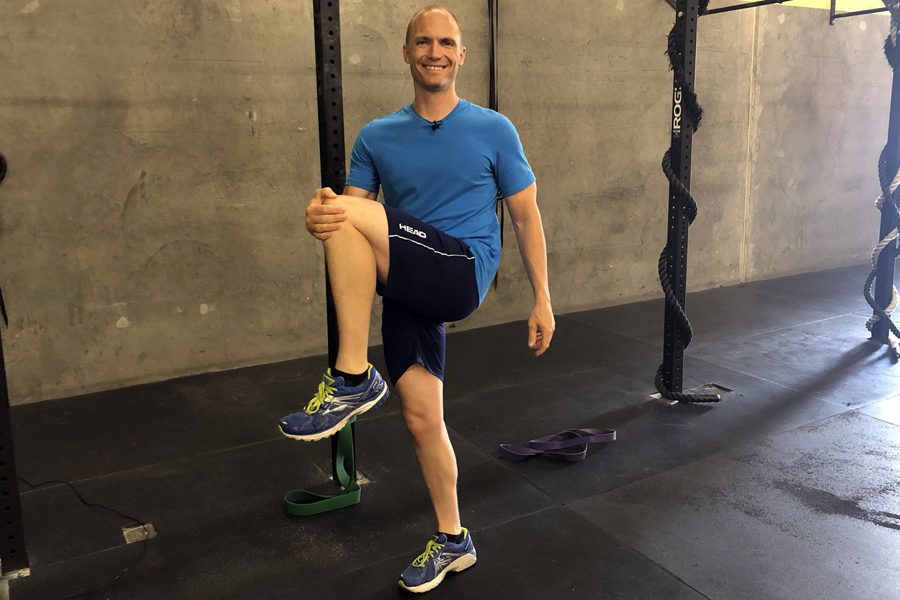
Be as active as you can

Don’t stop moving, but avoid exercises that make your back hurt more. Typically, this includes flexion biased movements like sit ups. It’s important that you remain as active as you can. You may need to taper down certain activities that you know will increase your pain. This typically would be activities involving heavy loading of the spine such as squats with weight, deadlifts, and other activities that may cause forward flexion (particularly, under a load).

As you are able, continue to work on cardiovascular conditioning and core muscle activation (particularly, the lumbar extension exercises). Lift weights if you are able. Refer to the rule of thumb for movement (the concept of peripheralization and centralization). If your pain progresses from the area of the injury into your leg, then you need to stop that activity. If the pain remains constant or is progressing out of the leg, then continue with the activity as you are helping the body to heal.

Developing adequate strength in the lumbar extensor muscles and core musculature is the primary way to prevent initial episodes and to prevent re-occurring episodes of LBP. Research clearly indicates that the right targeted exercises are the most effective way to manage LBP. 

If you’re not sure how to effectively and safely exercise your back or if you’re already experiencing low back pain, be sure to check out my Treating Low Back Pain (LBP) during Exercise and Athletics Book and Video Package. USE DISCOUNT CODE LBP AT CHECKOUT FOR 15% OFF!

For the approximate price of just one co-pay to see a doctor, you will receive my easy to read book with step-by-step instructions and a complete video package designed to help you prevent and self-treat re-occurring low back pain episodes.

If you have a question that you would like featured in an upcoming video or blog post, please comment below or submit your question to contact@thePhysicalTherapyAdvisor.com.  In case you haven’t already, be sure to subscribe to my e-mail list and YouTube channel as well as join our community on Facebook by liking The Physical Therapy Advisor!

Advanced Techniques on How to Treat Hip Impingement

Hip impingement pain is commonly felt in the groin, front of the hip or sometimes the side of the hip or deep in the buttocks. Like many lower extremity injuries, hip impingement is often multifactorial stemming from muscle strength imbalances (often due to weakness in the deep hip external rotators) and/or hip mobility imbalances. These mobility imbalances combined with muscle strength imbalances lead to altered hip biomechanics and ultimately, pain and inflammation in and around the hip labrum. These issues can be accelerated or started by a traumatic event or an overuse situation. The biomechanical imbalances cause the labrum of the hip to become inflamed and painful. This inflammation makes the biomechanical issues causing the impingement worse which just perpetuates the problem. Addressing these muscle imbalances can lead to the permanent resolution of your pain and symptoms.

In a previous video, Treating Hip Impingement: Basic Techniques, I addressed the basics of how to self-treat hip impingement syndrome. In this video, I go over advanced techniques of how to utilize a EDGE Mobility Band or a pull up assistance band to help self-mobilize the hip and very quickly eliminate your hip impingement.

CLICK HERE TO WATCH NOW

If you work on your deep hip external rotation strength (as demonstrated in this video) along with the mobilizations you are likely to see results even faster.

If you’re interested in a more thorough guide along with other videos on how to self-treat lower extremity injuries and pain, check out the Resilient Runner Program. This is the perfect guide to help you take control of your health and fitness as well as self-manage common aches, pains, and injuries. Even if you’re not a runner, this program is appropriate for those who love to stay active and want to enjoy a healthy lifestyle.

If you have a question that you would like featured in an upcoming video or blog post, please comment below or submit your question to contact@thePhysicalTherapyAdvisor.com. In case you haven’t already, be sure to subscribe to my e-mail list and YouTube channel as well as join our community on Facebook by following The Physical Therapy Advisor!

Basic Techniques on How to Treat Hip Impingement

A common reason for anterior hip pain, groin pain or even side of the hip or deep buttock pain can be hip impingement. Hip impingement, like most hip pain, is often multifactorial stemming from muscle strength imbalances (often due to weakness in the deep hip external rotators) and/or hip mobility imbalances. These mobility imbalances combined with muscle strength imbalances lead to altered hip biomechanics and ultimately, pain and inflammation in and around the hip labrum. These issues can be accelerated or started by a traumatic event or an overuse situation. The biomechanical imbalances cause the labrum of the hip to become inflamed and painful. This inflammation makes the biomechanical issues causing the impingement worse which just perpetuates the problem.

In this video, I go over the basics on how to treat hip impingement. I discuss what to stop doing immediately and what you can start doing to eliminate your pain in order to get back to activity quickly without surgery or painful injections.

CLICK HERE TO WATCH NOW

Be sure to check out my other video, Treating Hip Impingement: Advanced Techniques.

If you’re interested in a more thorough guide along with other videos on how to self-treat lower extremity injuries and pain, check out the Resilient Runner Program. This is the perfect guide to help you take control of your health and fitness as well as self-manage common aches, pains, and injuries. Even if you’re not a runner, this program is appropriate for those who love to stay active and want to enjoy a healthy lifestyle.

If you have a question that you would like featured in an upcoming video or blog post, please comment below or submit your question to contact@thePhysicalTherapyAdvisor.com. In case you haven’t already, be sure to subscribe to my e-mail list and YouTube channel as well as join our community on Facebook by following The Physical Therapy Advisor!

9 Tips to Self-Treat Posterior Tibialis Pain

If you have pain along the inside (medial) portion of your ankle or even the arch of your foot, you may have posterior tibialis pain. Posterior tibial tendon dysfunction (PTTD), also known as posterior tibial tendon syndrome or tibialis posterior syndrome, can develop into a tibialis posterior tendon insufficiency which causes a fallen arch. In fact, Posterior tibialis insufficiency is one of the most common reasons for adult acquired flatfoot.

The posterior tibialis muscle is a particularly important muscle as it is used in plantar flexing the ankle (pointing the ankle/toes downward) and inverting the ankle (rolling it inward). More importantly, its role is to support the arch of the foot. Injury to this muscle is common for those that love to stay active and is common in sports with higher impact.

Posterior tibialis dysfunction can be associated with traumatic injury, such as a fall. It typically develops over time depending on your risk factors and the strain your foot has taken. PTTD is almost always progressive in nature. It begins with pain in the ankle, and then progresses to a more serious condition, such as a falling of the arch. When left untreated, this can cause adult acquired flatfoot. A fallen arch is also a common cause of plantar fasciitis.

Risk factors for posterior tibial tendon dysfunction (PTTD) include:

  • It is more common in women.
  • Those who are 40 years or older.
  • Obesity.
  • Hypertension (high blood pressure).
  • Diabetes.
  • Flat feet (sometimes called over pronation).
  • Poorly fitting or worn out shoes.
  • Poor mobility in the first (great) toe.
  • Weak ankle muscles (particularly, the posterior tibialis or the foot intrinsic muscles that help to support the arch of the foot).
  • Weakness in the hip, pelvic, and/or core muscles can lead to faulty gait mechanics.
  • A change in running surfaces or environments. This is most evident when transitioning from a softer running surface, such as dirt, to a concrete running track or running downhill. This causes overuse or overtraining of the tendon.
  • Training overload. Performing too high of training intensities and volumes. This overuse or overtraining of the tendon causes inflammation, swelling, and pain. 

Symptoms of PTTD:

  • Pain is typically located along the length of the tendon (which is located on the inside of the foot and ankle near the bump known as the medial malleolus). Pain may also occur in the foot where the tendon attaches to the navicular bone near the arch of the foot.
  • The area around the tendon is usually red, warm, and swollen due to an active inflammatory process.
  • Pain located along the tendon is worse with activity. The higher the impact, the worse the pain.

As the condition worsens, the arch will begin to flatten. The ankle and foot begins to roll in as the toes move outward with each step. In advanced cases, a person will often compensate by having the entire lower leg roll outward which often leads to knee, hip, and low back pain.

Once the arch has fallen, pain is more commonly felt on the outside of the ankle (as the posterior tibialis tendon has usually ruptured at this point).

9 Tips to Self-Treat Posterior Tibialis Pain:

Initial treatment.

This condition typically begins as an overuse syndrome with an active inflammatory cycle occurring. The initial course of treatment includes RICE, which stands for Rest, Ice, Compression, and Elevation.

Self-mobilize the tissue.

Be sure to mobilize the tissue in and around the shinbone (tibia). You could also use a tennis or lacrosse ball to aggressively work out the tissue along the shin (as demonstrated in Posterior Tibialis Tendon Dysfunction Exercises). Take care not to be too aggressive when mobilizing the posterior tibialis tendon initially or you may make the pain worse. Instead, initially focus on any other mobility and myofascial restrictions in the lower legs. Utilize a foam roller to address any lower leg tightness or restrictions. I tend to use the foam roller for the larger parts of the leg including the thigh, back of the leg, calves, and buttock muscles. Please refer to Lower Extremity Mobilizations using a Foam Roll.

Strengthen your foot and ankle complex.

Weakness in the foot and ankle muscles is a major risk factor in developing PTTD. I recommend initiating a complete ankle and foot strengthening protocol (as demonstrated in Posterior Tibialis Tendon Dysfunction Exercises).

Improve your balance.

Poor balance is often associated with muscle weakness in the foot and ankle as well as the knee and hip musculature. Weakness and balance deficits can lead to poor foot mechanics, which can lead to excessive strain on the posterior tibialis tendon. Practice balancing on one foot.

If you change running surfaces, progress slowly.

If you typically run on softer surfaces, such as dirt or a running track, progress carefully and slowly to running on a harder surface (like concrete). Over all, softer running surfaces are better for your body. If your job requires that you stand on a hard surface, adding a foam pad or rubber mat can decrease the strain on your foot and arch.

Avoid training overload.

Don’t progress your training volume and/or intensity levels too quickly. PTTD is most commonly diagnosed as an overuse injury. Proper training is very important to avoid overloading your body. Improper progression of training volume and/or intensity can easily lead an overuse injury like PTTD, Achilles tendinitis or other lower extremity injuries.

Add an orthotic.

Additional foot control is often needed to normalize gait mechanics. Many running stores sell an over-the-counter orthotic such as Superfeet Blue Premium Insoles. The blue tends to fit most feet, but a variety of options are available for customization. In my experience, these insoles can last 1,000 to 1,500 miles easily.

In this video, Taping for Posterior Tibialis Tendon Dysfunction (PTTD), I demonstrate a taping technique for supporting the arch and the bottom of the foot for those suffering from PTTD.

If you continue to experience pain related to your foot or footwear, then you may need to consult with a physical therapist that specializes in feet and orthotics. A custom orthotic may be necessary to correctly support your foot and insure proper foot mechanics. Seek assistance from a professional who is a runner and has experience with treating other runners.

Immobilization.

Sometimes you may need to wear a walking boot in order to immobilize the foot and ankle complex to allow the tendon to heel. In very severe cases, you may need to completely avoid all weight bearing activities. Please seek instruction from your medical physician. If the condition worsens, it’s pertinent to intervene prior to tendon failure.

Ask for help.

If you’re still experiencing pain after implementing these self-treatment strategies, then it may be time to seek additional help. If you are not progressing after 3-4 weeks of implementing these treatment options, speak to your medical professional. Do not take this condition lightly. Other medical conditions can mimic or be associated with PTTD. Your medical physician or physical therapist can help to determine if your pain is associated with a stress fracture, plantar fasciitis, shin splints or another condition. Your physician could also prescribe a stronger anti-inflammatory medication if necessary.

The American Physical Therapy Association offers a wonderful resource to help find a physical therapist in your area. In most states, you can seek physical therapy advice without a medical physician’s referral (although it may be a good idea to seek your physician’s opinion as well).

What has helped you the most to self-treat posterior tibialis pain? Please share your tips!

If you have a question that you would like featured in an upcoming video or blog post, please comment below or submit your question to contact@thePhysicalTherapyAdvisor.com. In case you haven’t already, be sure to subscribe to my e-mail list and YouTube channel as well as join our community on Facebook by following The Physical Therapy Advisor!

Mobility Bands: Benefits and How to Use

Mobility bands (like the VooDoo Floss Band) are gaining in popularity as a self-treatment tool particularly among the athletic population. There are many brands manufacturing mobility or floss bands with most of them being very similar. Most mobility bands utilize a long piece of thicker elastic latex rubber to compress tissue in or around varying locations. Other brands (like the CTM Band) have made innovations to the more traditional style band which allows for a more aggressive mobilization into the soft tissue. (“CTM” stands for compression, tension, and movement.)

Reasons why you may choose to utilize a mobility band include:

  • Pain modulation.
  • Decrease myofascial type pain from muscle spasms and trigger points.
  • To improve range of motion of a particular joint or tissue.
  • To decrease edema and swelling.
  • To reduce blood flow as part of a workout strategy such as blood flow restriction (BFR) training.
  • To improve blood flow as part of a treatment OR as recovery/rehabilitation strategy in order to reduce edema or swelling in an injured area.

If you suffer from any form of blood clotting disorder or are on blood thinning medications, I would advise against utilizing mobility bands for any type of deep compression.

Presently, there are few research studies on the effectiveness and efficacy of utilizing mobility bands. However, there is a lot of antidotal evidence including my own.

What we know from the existing research is that “flossing” appears to have the most impact on ankle mobility and performance. In particular, short-term increases in ankle dorsiflexion mobility can have positive effects on activities (such as squatting and single-leg jump performance) and reduce ankle pain.

Present studies investigating the effect of flossing on the shoulder and elbow joints are yet to show significant improvements in mobility or power. However, increases in elbow mobility were noted in tennis players that had an existing mobility restriction.

The exact mechanism of action on how and why mobility bands work is still under debate. The general feeling is that depending on the intended use of the mobility bands, there are likely multiple mechanisms of actions. One or more of the mechanisms are likely being emphasized to produce the desired effect. My thought is that there are three major systems affected when utilizing mobility bands: circulation (blood flow); fascial (mobilization); and neuromodulation (improved range of motion through a nervous system response).

Blood Flow

Blood flow is affected because of the amount of compression provided by the mobility band. An immediate effect on the tissues will occur. This happens when the mobility band is applied (restricting the blood flow), and when it’s taken off (allowing for a rush of blood to the area).

This can have two positive, yet different effects: to decrease swelling and to cause nutrients to be delivered to the affected tissues. If the mobility band is used over an edematous (swollen) area, then the mechanical compression from the mobility band can help to decrease the swelling. To enhance the effects of the compression, all one must do is repeatedly move the compressed area through a normal range of motion. This combines the body’s natural muscle pump with mechanical compression while more swelling maybe eliminated. This is a short term effect as the mobility band should only be applied for 60-90 seconds at a time. (This technique is probably not suitable for highly edematous areas or those who suffer from lymphedema.)

As the mobility band is removed, the body’s immediate reaction is to restore blood flow which can cause hyper perfusion of the tissues. This hopefully will cause additional nutrients to be delivered via blood flow into the affected tissues.

Fascial Mobilization

Another theory on how mobility bands work is via fascial shearing. By adding a compression force to a tissue and then sliding it back and forth, one creates a type of “tack and floss” motion that seems to affect soft tissue and fascia. This is effectively a method of self-fascial mobilization.

Compressing muscle groups and taking them through their range of motion creates a flossing effect (which is where the term VooDoo flossing came from) between individual muscles. Compressing the fascia while flossing the tissues (by moving the extremity back and forth) may break up adhesions in the fascia that exist. This will allow for better range of motion and movement while reducing pain by addressing myofascial restrictions.

The CTM Band has taken this concept and added small rubber knobs within the band to increase the intensity of the flossing. Depending on how the knobs on the band are positioned, this creates a more pin point tack and floss scenario. This particular band can be highly effective for muscle groups in the calf, quadriceps, and hamstring area. Use code MTA15 for a 15% discount. (CTM Band techniques are not typically performed during the acute phases of recovery. They are more for prevention /pre-hab or to be used during the sub-acute or chronic phases during rehabilitation/recovery.)

Along with the tack and floss theory and depending on where the mobility bands is placed (like over a knee or ankle joint); one may produce a significant enough compression force over a joint with the mobility band that it creates a distraction force. This may create extra room in the joint capsule. Mobilizing a joint with the VooDoo Floss Band allows that particular joint’s full range of motion (without restrictions). In this case, there is an actual mechanical force affecting tissue length and/or mobility. This could have a mechanical “mobilizing” effect if the capsule was tight, but it could also be affecting joint mechanoreceptors (neuromodulation).

Neuromodulation

By positioning the mobility band over a joint to cause a distraction force over the joint and within the capsule, thereby allows for improved alignment and freedom of motion within the joint. This can have a neuromodulation affect over the joint which allows for improved range of motion. Although this can be a mechanical change, it may also be a neuromuscular change where joint mechanoreceptors are activated in a positive way. This can allow you to more freely utilize the extremity that you applied the mobility band to. Neuromodulation may also be achieved just through the unique stimulation caused by the band activating neuromechanoreceptors. The mobility band likely has multiple effects at once; more research needs to be done.

How to Use a Mobility Band

When using a mobility band, you generally wrap it toward your heart. The goal is to create a large compression force around the restricted joint or tissue. To achieve this, wrap the mobility band starting 2-3 inches below the area you want to treat. Aim to finish wrapping about the same distance above the treatment location. While wrapping, overlap about half the width of the mobility band. For mobility, a stretch of around 50-75 percent can be applied to the mobility band at the area you are treating. If you have any leftover band, additional compression can be applied by making an “X” over the treatment area.

Once the mobility band has been applied, you can try moving into the position causing restriction or by moving the joint or limb in all possible directions. There are guidelines for how long to keep the mobility band on. A general rule is to aim for around 1-2 minutes.

The application of the mobility band is going to compress the underlying tissues. However, care must be taken to not over compress or injure tissues. Discontinue use if you begin to feel the following:

  • You begin to feel numbness or pins and needles (a sensation of uncomfortable tingling or prickling).
  • You suddenly feel claustrophobic.
  • You are losing volitional control of the extremity.
  • You are experiencing increased pain or instability within a joint.

The mobility band should only be applied on the extremities. It should not be applied over your trunk area or any acute injuries including fracture sites, blood clots, wounds or any tissue areas that may be extremely sensitive to compression. Do not utilize if you have any medical reason not to utilize this technique. Common sense should always be utilized when using mobility bands as a treatment modality. If you’re not sure, then please speak to a medical practitioner prior to utilization. If you suffer from any form of blood clotting disorder or are on blood thinning medications, I would advise against utilizing mobility bands for any type of deep compression.

More specific instructions and examples on how to and why you may want to utilize a mobility band as part of a rehabilitation protocol (or even just to aid in recovery after longer runs) are covered in the Resilient Runner Program, which is designed to help YOU meet YOUR training goals by insuring you have the tools to avoid injury, recover quickly, and train at a peak level.

What’s Inside the Resilient Runner Program:

  • Guidance on preventing and self-treating common running related injuries, including Hip Flexor Pain, Runner’s Knee, IT Band Syndrome, Piriformis Syndrome, and more!
  • Specific guidelines on when and how to return to running after experiencing an injury.
  • Rehabilitation guides with step-by-step photos demonstrating recommended exercises.
  • Step-by-step instructions on how to apply Kinesiological tape.
  • Downloadable podcasts, videos, and more!

If you’re tired of ongoing aches, pains, and injuries, learn how to become a resilient runner so that you can continue to train and compete in order to meet your goals!

I WANT TO BE RESILIENT!

How to Fix a Crack in your Heel

Worrying about a crack in the skin of your heel might seem a bit odd since cracks are quite common. It’s estimated that this condition affects approximately 20% of the people in the United States with over half of the cases affecting females. These cracks are also referred to as heel fissures. They are painful and can become infected so they need to be taken seriously.

These cracks or fissures are typically associated with thickened callused areas along the heel and dry skin. If the skin is dry and callused, it doesn’t have good elasticity so the skin becomes stiff and prone to cracking (resulting in the fissures). The fissures are often associated with obesity, poor footwear or standing for long periods of time.

Risk Factors:

  • Prolonged standing.
  • Obesity.
  • Shoes without backs that allow the skin to stay open to the elements.
  • Poorly fitting shoes that cause friction or shearing in heel pad area.
  • Dehydrated skin.
  • Cold weather or very dry climates.
  • Diabetes which usually leads to poor skin healing due to its negative effects on blood flow and nutrient exchange in the lower extremities.*
  • Other skin conditions such as psoriasis, eczema or fungal infections like athlete’s foot.

*These cracks are at a high risk for infection (particularly, if you are diabetic).  See a physician right away if you are experiencing acute soreness, redness, swelling or severe pain in this area or the foot for more than a day or two.

How to Self-Treat a Crack in the Heel:

  • Identify the reason it developed in the first place. Is your skin constantly too dry or flakey? Then start a daily lotion and moisturizer routine. Are your shoes fitting properly or do you have a fungal infection that is affecting the skin? Deal with any known risk factors for the condition.
  • If you have a large callus in this area, be sure to keep the callus trimmed down and in check. You may need to initially get help from a podiatrist if your callus is exceptionally thick or if you are diabetic. Otherwise, use a heel file or pumice stone. Keep the skin moisturized through a quality lotion that does not have additional ingredients or perfumes for smell. A product like Kerasal Intensive Foot Repair Ointment can help soften very hard and rough skin along the heel.
  • While you work on keeping the area moisturized and getting the callus smaller, skin glues can be helpful to prevent the area from splitting further and to provide a barrier to prevent infection.
  • Use a product like Flexitol Heel Balm which contains 20% Urea. This can help soften the skin and reduce the callus area. If you want it to work even better, try applying a barrier cream (like petroleum jelly or lanolin lotion) over top. Consider wearing cotton socks over top of the barrier cream to help keep moisture in. It also allows the skin to breath and can prevent staining of your bedding.
  • Try to limit excessively long and hot baths or showers as this will dry the skin further.
  • Always use fragrance free products.
  • Always moisturize the area after bathing or showering.
  • Wearing shoes with a closed heel can help heal and prevent cracks to the back of the foot. Shoes with closed heels with cushioning give support to the problematic area.
  • Try to wear padded socks. Wearing cotton socks with shoes may help to reduce friction as well along the heel. Cotton socks can also soak up sweat and moisture, allow the skin to breathe, and help to prevent the skin drying out.

If the condition is severe, worsens or just doesn’t seem to heal, additional medical care may be required. A medical provider (like a podiatrist) can help:

  • Remove dead skin.
  • Prescribe stronger softening or removal agents.
  • Apply medical glue to seal cracks.
  • Prescribe an antibiotic if there is an infection.
  • Wrap the heel with dressings or bandages to protect the area and/or help it heal through different medications and bandages.
  • Recommend shoe inserts, heel pads or heel cups.

Cracked heels are common, but can be problematic and downright painful if left untreated. If you’re not experiencing relief and progressing with the heel crack significantly improving after two to three weeks of aggressively managing the symptoms, contact your medical provider.

Do you have any specific remedies for fixing a cracked heel? Please share your tips!

If you have a question that you would like featured in an upcoming video or blog post, please comment below or submit your question to contact@thePhysicalTherapyAdvisor.com. In case you haven’t already, be sure to subscribe to my e-mail list and YouTube channel as well as join our community on Facebook by following The Physical Therapy Advisor!