How to Self-Treat an Ankle Sprain (Part I)

Ankle sprains are a common occurrence and can happen to anyone at any age.  The Journal of Sports Medicine (January 2014) conducted a meta-analysis on the topic of ankle sprains.  The findings concluded that women were at higher risk of ankle sprains and that children were more likely to sprain an ankle than an adolescent or an adult.  Indoor and court sports were the highest risk activity.  However, an ankle sprain can occur just as easy from stepping off a curb or accidentally on a pet’s toy.  So what is the best course of action to take upon spraining your ankle?  Starting with the acute phase, I will walk you through the treatment plan on how to rehabilitate your ankle in this three part series.  (If you’re interested in a more complete and comprehensive look at self-rehabilitating an ankle sprain, be sure to check out Treating Ankle Sprains and Strains).

AnkleSprain_1

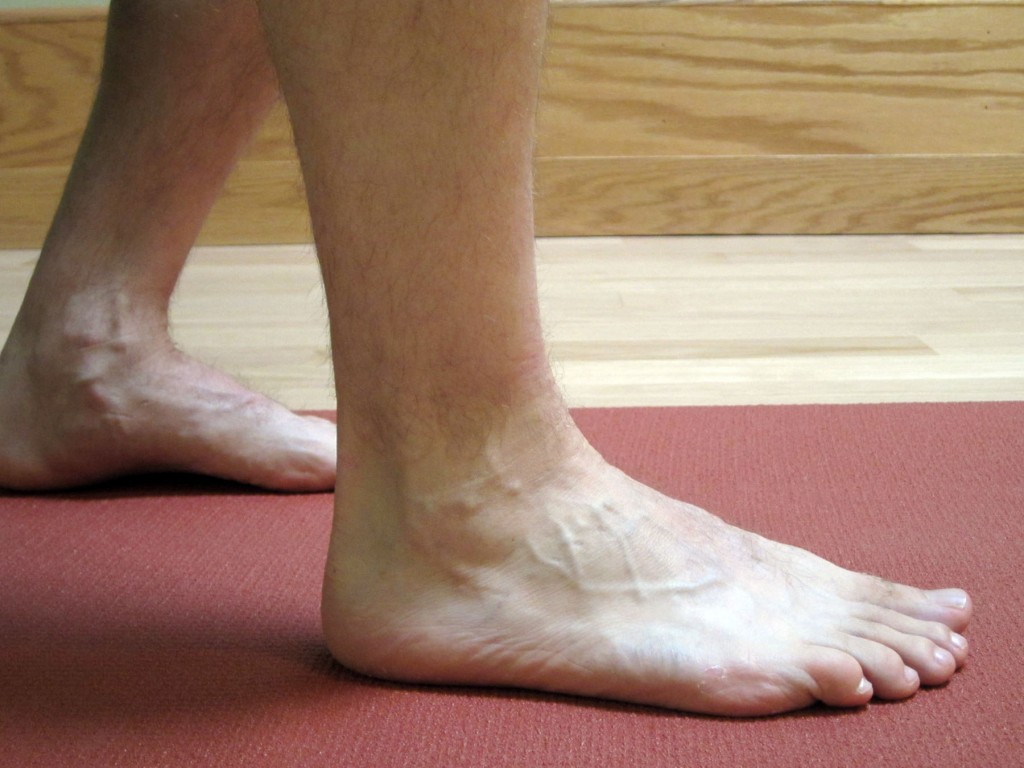
Many different types of ankle sprains are possible, but the most common sprain is known as the lateral ankle sprain.  Initially during a lateral ankle sprain, the foot rolls inward (inverts) farther than it should which causes a “sprain” of the lateral ligaments of the ankle.  It may also affect the lateral muscles or tendons of the ankle which produce eversion of the foot.  The muscles most typically affected are known as the peroneals.  In more severe cases, the fibula bone or the fifth metatarsal bone near the pinky toe could also be injured either with a fracture or the tendon could rupture from the bone.

For discussion purposes, I will only address the basic lateral ankle sprain.  At the time of injury, a person may often feel or hear a popping sound.  This is followed by a fairly rapid onset of swelling in the ankle, typically along the lateral (outside) part of the ankle (near the bump known as the lateral malleolus).  This is also usually associated with a significant amount of pain.

Depending on the severity of the pain, the location of the swelling, and any potential bruising, your course of treatment may vary.  If you are unsure as to the severity of the sprain, are in severe pain, or you’re not sure how to handle the injury, I recommend that you seek competent advice from a medical doctor, physical therapist, or athletic trainer.

Assuming you don’t have a more serious injury, the initial course of treatment following the sprain includes RICE, which stands for Rest, Ice, Compression, and Elevation.

  • Rest – In this case, rest would indicate not using the ankle.  I would initially recommend using a crutch or crutches to either fully unweight the ankle (or at least take some pressure off) when walking.
  • Ice – Apply ice to the ankle, and the sooner, the better.  The rule for icing is to apply ice no more than twenty minutes per hour.  Do not place the ice directly against the skin, especially if you are using a gel pack style.  Individuals with poor circulation or impaired sensation should take particular care when icing.  A bag of frozen peas can be ideal.
  • Compression – Compression helps prevent and decrease swelling.  Swelling can cause increased pain and slow the healing response, so limit it as much as possible.  You can utilize a common ACE wrap or you can purchase a pair of mild over-the-counter compression socks.  If you have a friend who is medically trained, many different taping techniques can also assist in decreasing swelling.  Many physical therapists or athletic trainers can apply Kinesiology Tape or Mummy Tape for you or you can find application techniques online.
  • Elevation – Elevate means to keep the ankle above the level of the heart.  This allows for gravity to assist in keeping the inflammation and swelling down.  Typically, I would combine the ice with compression and elevation.

Gentle Movement

During the acute phase, move the ankle as much as you can tolerate.  I would not be aggressive with the movement.  I would not move the ankle if it caused more than a mild to moderate increase in pain.  This may irritate the injury and cause more swelling and inflammation.  Movement is good and helpful unless it’s causing extreme pain.  Focus on the up and down movement of the ankle (known as plantarflexion and dorsiflexion), NOT on the side to side motion (known as inversion and eversion).

Possible Supplementation

During the acute phase, I recommend starting at least a thirty day course of CapraFlex.  Capra Flex is an organic glucosamine and chondroitin supplement which also includes an herbal and spice formulation designed to naturally decrease inflammation and support healing.  I recommend it to anyone recovering from an injury or attempting to prevent injury when performing at a very high level.  I personally use it, and in my practice, it has helped clients recover faster and prevent injury.  It can interfere with some blood thinning medication, so if you are on this type of medication, please check with your physician.

The initial acute phase of an ankle sprain can last one to seven days on average.  Before progressing into the next phase of rehabilitation, you should be able to stand with equal weight on your feet and not have a significant increase in pain.  Once you can, it is time to progress into the intermediate phase (to be covered in Part II).

Knowing how to effectively self-treat and manage ankle sprains and strains is important in order to resume your training and normal activities without the risk of additional damage, injury or re-injury.  When you can confidently self-treat, you can limit pain levels, return to activity faster, and prevent reoccurrences.
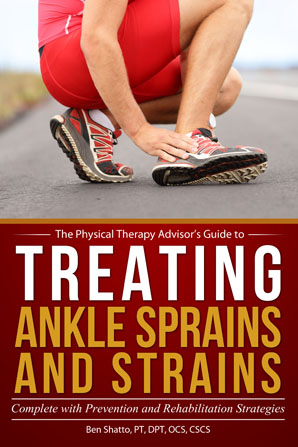
AVAILABLE NOW ON AMAZON!

In my book, Treating Ankle Sprains and Strains, you will learn how to safely and confidently self-rehabilitate a common ankle sprain.  It will guide you through the ins and outs of self-treating your ankle so you can avoid costly rehabilitation bills.  Beginning with the acute phase of rehabilitation, I will walk you through the treatment plan on how to rehabilitate your ankle through the intermediate (sub-acute) phase of rehabilitation and return to full activity and sport.

Learn how to safely self-treat and properly rehabilitate your ankle so you can get back to your daily life and exercise goals more quickly without additional costly medical bills!

BUY NOW

How to Rehabilitate Achilles Tendinitis

MTA_TheMarathonThatGotAway

http://marathontrainingacademy.com/the-marathon-that-got-away

Marathon Training Academy

September 20, 2015

In this podcast, Trevor discusses the difficult decision to not run a race. He chose to avoid risking further injury as he prepares for a more important race in a couple of months. His particular injury and decision provided an opportunity for us to identify the cause of his Achilles tendinitis pain and the different methods he could utilize during his rehabilitation. Listen to the podcast

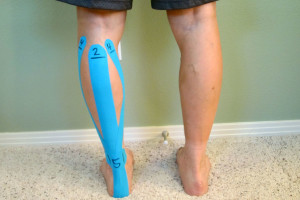
KinesiologicalTapingForAchillesTendinitisIn this particular episode, I mention several rehabilitation strategies, including utilizing mobility bands and Kinesiological tape.

For specific strategies on how to rehabilitate Achilles tendinitis, please refer to https://www.thephysicaltherapyadvisor.com/MTA.

How to Prevent and Self-Treat Shin Splints

MTA_ShinSplints

http://marathontrainingacademy.com/self-treat-shin-splints

Marathon Training Academy

September 12, 2015

In this guest post for Marathon Training Academy, you will discover the common causes for shin splints and learn simple prevention strategies and treatment options to quickly help aid in your recovery.

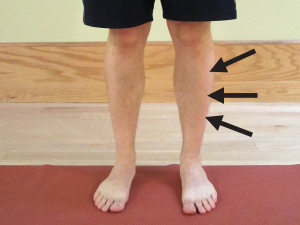
ShinSplints_Arrows_LandscapeThe term shin splints, also known as an anterior compartment syndrome, refers to pain along the shinbone (tibia), the large bone in the front of your lower leg. Shin splints can be excruciatingly painful to the point that you may struggle to walk or run. They are typically caused by inflammation in the anterior muscle of the lower leg known as the anterior tibialis muscle. This is the primary muscle needed to lift your foot. Shin splints are often considered an over use injury and unfortunately, are relatively common in runners. Discover the common causes for shin splints and implement these strategies to prevent and self-treat shin splints. Continue Reading

How to Train for an Obstacle Course Race

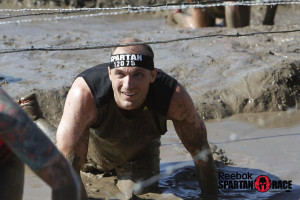
Obstacle course racing (OCR) is growing quickly and becoming a very popular sport.  It is a fun way to challenge your strength, fitness, and mental fortitude.  With the proper training and recovery, this style of racing can be performed safely.  Whether you are a newbie or a seasoned Spartan, I offer tips on how to optimize your racing experience.

(Courtesy of Reebok Spartan Race)

(Courtesy of Reebok Spartan Race)

I competed in my first OCR, the Boise Spartan Sprint, thanks to a friend.  She transferred her registration to me after suffering a knee injury and was unable to participate.  Thank you, Jenifer, for prompting me to try something new!  It was a blast!

How to prepare for an OCR?  Without any prior experience, I started by listening to Ben Greenfield’s Obstacle Dominator Podcast and reading about Spartan Race Training.  I have competed in many running and trail races at varying distances, so I felt that I could adequately train despite being on a long vacation the two weeks prior to the race.

The Boise Spartan Sprint

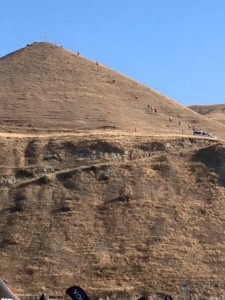
Obstacles, courses, and distances vary for each event.  This particular course offered options to skip certain obstacles, but you had to pay a 30 burpee penalty.  Although there were options available to insure all who wanted to participate could, the terrain was not suitable for everyone.  There were five quite steep hills to climb up and down during the 4 mile course.  They were much steeper than I expected, and I’m used to hiking similar terrain while hunting.

SpartanSprint_Hills

The other surprise was how the water obstacles made for a new challenge (particularly when combined with other obstacles such as the rope climb).  I am typically a pretty good rope climber, but getting a good foot hold was difficult when submerged in 3 feet of water.  Fortunately, I was able to overcome the challenge.

After experiencing the general tempo of this particular course and its layout, I better understand how to train for an OCR.  My final ranking was number 180 out of 3,394.  Not too bad for a first attempt, but nothing like the elites!  I will be sure to incorporate more of these tips and lessons learned when training for my next OCR.

Finisher

7 Tips on How to Train for an Obstacle Course Race:

  1. High intensity interval training (HIIT). The amount of HIIT in preparation for your race will vary and is dependent on the distance. If the race course will be a shorter distance (under 5 miles), then a majority of your running could be HIIT and shorter distance recovery runs. If you will be competing in longer distances (10 miles or more), then I would still incorporate a weekly longer run just so your body will be prepared for the mileage and time on your feet. I highly recommend that you run outside–preferably on a trail or uneven terrain to prepare your legs adequately. You will need to feel comfortable running downhill on uneven terrain. Please refer to my Training Plan that I used for Race to Robie Creek, a very steep half marathon 8.5 miles uphill and 4.6 miles downhill.
  2. Train for the pack. In larger races or in races where there is a variation in skill levels, I recommend training for this variable. Constantly changing your running pace faster or slower is more tiring than just running at your preferred pace. One easy and effective running style to train for this variable is called the Fartlek, Swedish for speed play. It involves taking your normal forty to sixty minute run (after a warm up) and intermittently changing your pace from jogging (at different speeds) to sprinting. This can be performed in a structured form or randomly in true Fartlek style. One method is to pick objects in front of you and vary your running speed as you approach them. This is a critical training method if you want to improve your race time.
  3. CrossFit as a form of high intensity training (HIT) is an excellent method to train your legs to handle the hilly terrain (including a very fast and steep decent). The obstacles may include: picking up heavy objects and carrying them either in front or sometimes overhead; scaling walls; swinging and climbing along monkey bars; rope climbing; and crawling in mud. CrossFit taught me how to prepare for these different obstacles by refining the skill sets necessary to tackle them. It also prepared me to perform the obstacles when fatigued.
  4. Climbing Wall. One of the obstacles included traversing a climbing wall sideways for 20+ feet. Participants were not allowed to climb up or let their feet touch the ground. I suggest practicing this at a local climbing wall. Although I was able to perform the obstacle, I was much slower as I rarely spend time on a climbing wall.
  5. Monkey Bars. Spend time practicing swinging, climbing, and moving in different directions on monkey bars to better prepare for the different obstacles. It’s also an excellent method to increase your grip strength.
  6. Clothing can be an interesting variable. For my particular OCR, the temperature was quite warm (above 80 degrees). The water obstacles helped to keep my body cool. In hindsight, additional clothing should have been considered in order to avoid cuts and scrapes. I wore a long pair of compression socks to help with cramping and protection from ground cover. I wish that I would have worn knee protection. The crawling cut up my knees and made them feel sore. Also, when scaling the walls, I got scrapes under my arms because I wore a tank top. I recommend wearing clothing that will protect your body for the likely scrapes and cuts that will occur.
  7. Ankle Sprain Prevention. I had been warned that this particular course was hilly. In preparation, I decided to utilize Mummy Tape for ankle stability. (You can also use Rock Tape, KT Tape or any other Kinesiological style tape.) This video, KT Tape Ankle Stability, demonstrates the technique I utilized to help improve my ankle stability in order to prevent an ankle sprain. For application and removal tips, please refer to Skin Care with Taping.

Once you complete the OCR, enjoy your accomplishment, but don’t forget to implement proper recovery strategies!  Be sure to properly cool down after the race.  Don’t sit!  Stretch and continue to move.  You will need to make sure that any scratches or wounds are properly cleaned and covered.  Hydrate appropriately and begin working through your recovery process.  For more information on how to quickly recover, please refer to the following posts: 14 Tips and Strategies to Self-Treat Muscle Pain and Muscle Cramping & Spasms – Treatment Options.

Have you competed in an OCR before?  Please share your experience by leaving a comment below.

If you have a question that you would like featured in an upcoming blog post, please comment below or submit your question to contact@thePhysicalTherapyAdvisor.com.  Be sure to join our growing community on Facebook by liking The Physical Therapy Advisor!

How to Self-Treat Shin Splints

If you have ever experienced shin splints (anterior compartment syndrome), you know how excruciatingly painful it can be.  You may struggle to run or walk.  The pain can linger for weeks and months–taking the fun out of running and exercise.  In the previous post, I discussed How to Prevent Shin Splints.  Now I will provide simple treatment options to quickly help aid in your recovery.  Shin splints can typically be easily self-treated if you don’t have a more serious medical condition, such as a stress fracture, causing the pain.

ShinSplints_Treatment_Landscape

How to Self-Treat Shin Splints: 

  • Ice. Although shin splints can occur insidiously, they are often associated with a specific event. An active inflammatory process typically occurs. Apply the ice to the anterior tibialis muscle (the muscle right next to the shinbone). The rule for icing is to apply ice no more than twenty minutes per hour. Do not place the ice directly against the skin, especially if you are using a cold pack. A bag of frozen peas can be a cheap alternative. Individuals with poor circulation or impaired sensation should take particular care when icing.
  • Rest. If you are experiencing an episode of shin splints, then you will need to rest. Avoid running (particularly downhill). At the very least, taper your training intensity and avoid exercises that place undue stress on the shins, particularly the anterior tibialis muscle. Utilize this time to incorporate cross training activities, such as yoga, to improve flexibility as shin splints can be linked to poor mobility.
  • Consider changing your shoes. Your shoes may be worn out and may be the cause of the pain. If you wear a shoe that helps to limit overpronation, remember that the inner cushion and structure of the shoe can wear out before its outer appearance. If this occurs, the shoe can no longer adequately control inappropriate foot and heel movements such as overpronation. This can lead to shin splints as well as IT band syndrome or other hip, knee, or ankle related issues. Shoes only last 350-500 miles. If you are nearing those miles, then it may be time to change.
  • Add an orthotic. Additional foot control is often needed to normalize gait mechanics. Many running stores sell an over-the-counter orthotic such as Superfeet Blue Premium Insoles. The blue tends to fit most feet, but a variety of options are available for customization. In my experience, these insoles can last 1,000 to 1,500 miles easily. If the over-the-counter options aren’t helping you, please see a physical therapist or podiatrist for custom orthotics. Seek assistance from a professional who is a runner and has experience with treating other runners.
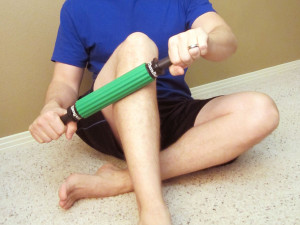
  • Warm up prior to exercise. I recommend that you increase your normal warm up time by at least 10 minutes in order to increase blood flow to the area. This allows for better mobility and also prepares the tissues for exercise. Consider using a self-massage tool to roll up and down the anterior tibialis as part of your warm up. My favorite self-massage tools for this area include the Thera-Band Standard Roller Massager and The Stick Self Roller Massager. I also recommend using the massager on your calf muscles. Perform calf stretches, but be mindful that prolonged static stretching before exercise may worsen performance.
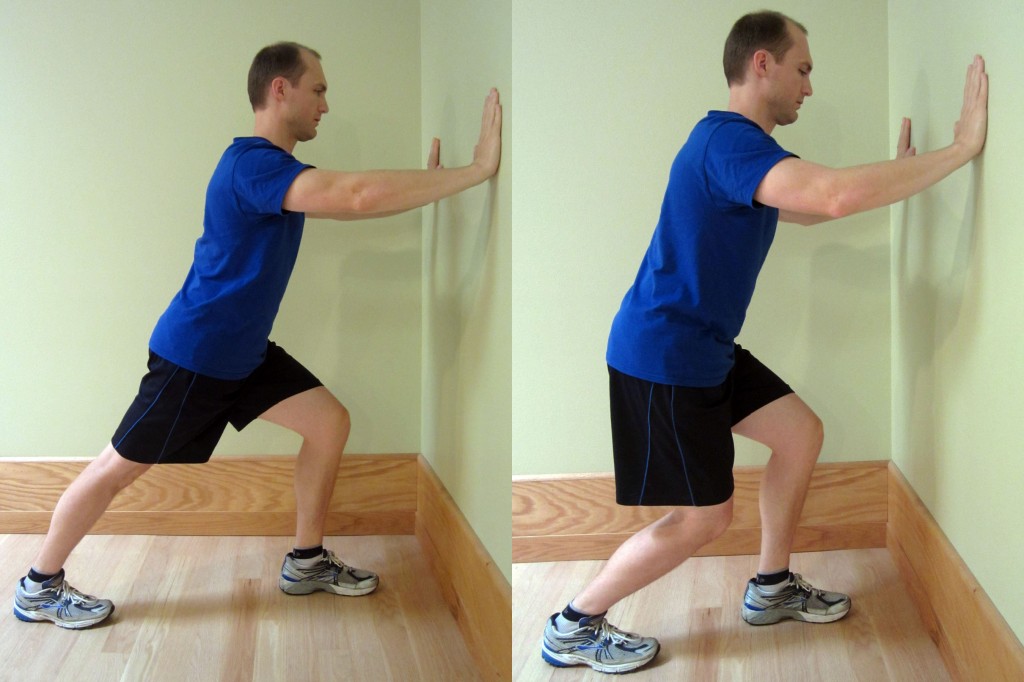
  • Cool down. After performing your exercises, take extra time to cool down and stretch. Focus on calf stretching as well as general lower extremity mobility stretches. Use the same self-massage tools as you did during your warm up. If you are prone to developing shin splints, I highly recommend regular massage and mobilization of the anterior tibialis muscle, as well as the calves. Tightness in the calves and Achilles tendon are a risk factor for developing shin splints. Be sure to emphasize stretching your calves. Hold each of the following stretches for at least 30 seconds, 3 times on each leg, 2-3 times a day. (These stretches shouldn’t cause more than a mild increase in pain or discomfort.)

Calves

  • Self-mobilize the tissue. Be sure to mobilize the tissue of the anterior tibialis. For this particular area, you may want to use one of the self-massage tools referenced above. You could also use a tennis or lacrosse ball to aggressively work out the tissue along the shin. Remember that mobility issues and myofascial restrictions in the lower legs are highly correlated with the development of shin splints. Use the foam roller to address any lower leg tightness or restrictions. I tend to use the foam roller for the larger parts of the leg including the thigh, back of the leg, calves, and buttock muscles. To learn how to use a foam roller, please refer to Foam Rolling for Rehabilitation.
  • Work on the stabilizing muscles of your hips and ankles. As part of a comprehensive rehabilitation protocol, I almost always have clients work on keeping the muscles of the pelvis, hips, and ankles strong. This will help to maintain normal gait mechanics during exercise and running. Not only will this help to prevent shin splints, it will likely help to prevent developing other orthopaedic issues such as plantar fasciitis and hip or knee pain. Please refer to Ankle Resistance Exercises and How to Safely Self-Treat Low Back Pain for my recommended hip and lumbar stabilization strengthening exercises.
  • Work on your balance. Poor balance is often associated with muscle weakness in the foot and ankle as well as the knee and hip musculature. Weakness and balance deficits can lead to poor foot mechanics, which can lead to excessive strain. I always include balance work as part of my recommended rehabilitation protocol. Please refer to Improving Balance by Using a Water Noodle, How Do I Improve Balance? (Part I), and How Do I Improve Balance? (Part II).
  • Kinesiological taping. The purpose of the tape is to assist the anterior tibialis muscle with its contraction and to possibly help with swelling and nutrient exchange by assisting the lymphatic system. I have had luck using the KT TAPE and Mummy Tape brands. When treating shin splints, I recommend following these step by step instructions for Kinesiological Taping for Shin Splints. For application and removal tips, please refer to Skin Care with Taping.
  • Use a compression sleeve or stocking. This condition is often associated with swelling and inflammation in the anterior compartment of the lower leg near the shinbone (tibia). The compression sleeve/socking can help to limit the amount of swelling and promote blood flow back out of the lower leg. This insures better nutrient exchange, waste removal, and can limit the swelling. I particularly recommend wearing a pair while you are in the rehabilitation phase or tapering back into full activity. There are many different styles of compression socks and sleeves, but I prefer Vitalsox Graduated Compression Socks. If you prefer a sock style, then I recommend choosing a pair that is at least knee high.
  • Start a supplement. Many herbs help to reduce inflammation and pain. One of my favorites is called Phenocane Natural Pain Management.  It combines the following: Curcumin, an herb that reduces pain and inflammation; boswellia, a natural COX2 inhibitor that also reduces pain and inflammation; DLPA, an amino acid that helps to increase and uphold serotonin levels in the brain; and nattokinase, an enzyme that assists with blood clotting and reduces pain and inflammation. (If you are taking blood thinners, please consult with your physician prior to use as the herbs could interact with some medications.)
  • Ask for help. If you’re still experiencing pain after implementing these self-treatment strategies, then it may be time to seek additional help. Your medical physician can help to determine if your pain is associated with a stress fracture. He/she could also prescribe stronger anti-inflammatory medication if necessary. The American Physical Therapy Association offers a wonderful resource to help find a physical therapist in your area. In most states, you can seek physical therapy advice without a medical doctor’s referral (although it may be a good idea to seek your physician’s opinion as well).

Have you ever experienced shin splints?  If so, which treatment techniques have you found to be the most effective? Please leave your comments below.

Looking for that exercise or book I mentioned in a post?  Forgot the name of a product or supplement that you’re interested in?  It’s all listed in the new Resource Guide.  Check it out today!

If you have a question that you would like featured in an upcoming blog post, please comment below or submit your question to contact@thePhysicalTherapyAdvisor.com. Be sure to join our growing community on Facebook by liking The Physical Therapy Advisor!

Q & A: The #1 Way to Extend Your Life Span

Q.  Can you comment on the whole concept of stand-up desks? I know that sitting is the new smoking. Is it just a matter of standing at my desk (with everything elevated)? Or is there more to it than that? What exactly is it about standing with minimal other movement that is so much healthier than sitting? Erin

A.  Thank you, Erin, for the excellent question! Stand-up desks have become increasingly more popular during the last several years.  The latest research indicates that sitting for more than two hours at a time can significantly lessen your life span.  The real headline should be: Even if you are a regular exerciser, sitting for more than two hours a day will still lower your life span. The take home message is that frequent movement throughout the entire day is critical for health. A stand-up desk could be beneficial if you follow these simple guidelines:

  • Do not stand still. Standing still for long periods of time is as equally hard on the body (particularly in the lower lumbar, knees, ankles, and feet) as sitting. It can cause negative effects in the joints as well as cause circulation issues. Use a foot stool and frequently shift your weight and stand in different positions. Modify your position at least every five minutes.
  • Do not stand on a hard surface. Standing on a hard surface all day is not natural. Our native environment is full of softer surfaces such as dirt, sand, bark, and grass. Rarely would someone stand on a large section of concrete or granite without moving. Instead, I recommend standing on a rubber mat similar to the one a grocery store cashier may utilize in order to take the strain off of the low back and the joints of the lower extremities.
  • Get a treadmill desk. Walking all day long isn’t practical. An excellent way to keep moving (without excessive strain or fatigue) would be to have a treadmill on which you could slowly walk on as you work for several hours per day. The treadmill desk would allow you to keep moving and maintain a higher metabolic rate without excessive strain (as long as it is kept at a slow pace).

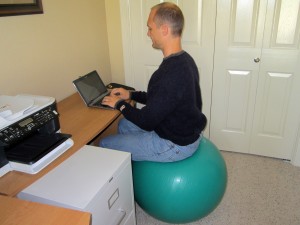
ExerciseBallWorkstation

  • Do not stand all day. Standing all day isn’t any better than sitting all day. The key to optimize your health is frequent moving. A desk that can be adjusted to sit or stand would be ideal. If you can combine it with a treadmill desk, then you would have the ultimate work station. When sitting at a desk, I recommend using a large Thera-Band exercise ball. The exercise ball provides you with the benefit of more movement while you work on your postural and core muscle development.
  • Go barefoot. We spend so much of our day in shoes that our feet forget what it is like to be unsupported and to actually feel the ground, which helps with balance to support our bodies. I recommend standing barefoot when possible and appropriate. If lower extremity swelling is an issue for you, then you may need an over-the-counter compression sock. Vitalsox Graduated Compression Socks can help you manage the swelling in your feet and can help prevent conditions such as spider veins or varicose veins.

When standing or sitting, pay close attention to your posture. Slouching while sitting or standing can cause pain and eventually, dysfunction.  My Top 8 Stretches to Eliminate Neck, Upper Back, and Shoulder Pain, full of photos and exercise instructions, can help you maintain good posture in sitting or standing.

What are your experiences in dealing with stand-up desks or treadmill desks? Are you intrigued to try one?  Feel free to leave your comments below.

If you have a question that you would like featured in an upcoming blog post, please comment below or submit your question to contact@thePhysicalTherapyAdvisor.com. Be sure to join our growing community on Facebook by liking The Physical Therapy Advisor!

Ankle Sprains – Acute Phase (Part I of III)

Ankle sprains are a common occurrence and can happen to anyone at any age.  The Journal of Sports Medicine (January 2014) conducted a meta-analysis on the topic of ankle sprains.  The findings concluded that women were at higher risk of ankle sprains and that children were more likely to sprain an ankle than an adolescent or an adult.  Indoor and court sports were the highest risk activity.  However, an ankle sprain can occur just as easy from stepping off a curb or accidentally on a pet’s toy.  So what is the best course of action to take upon spraining your ankle?  Starting with the acute phase, I will walk you through the treatment plan on how to rehabilitate your ankle in this three part series.

AnkleSprain_1

Many different types of ankle sprains are possible, but the most common sprain is known as the lateral ankle sprain.  Initially during a lateral ankle sprain, the foot rolls inward (inverts) farther than it should which causes a “sprain” of the lateral ligaments of the ankle.  It may also affect the lateral muscles or tendons of the ankle which produce eversion of the foot.  The muscles most typically affected are known as the peroneals.  In more severe cases, the fibula bone or the fifth metatarsal bone near the pinky toe could also be injured either with a fracture or the tendon could rupture from the bone.

For discussion purposes, I will only address the basic lateral ankle sprain.  At the time of injury, a person may often feel or hear a popping sound.  This is followed by a fairly rapid onset of swelling in the ankle, typically along the lateral (outside) part of the ankle (near the bump known as the lateral malleolus).  This is also usually associated with a significant amount of pain.

Depending on the severity of the pain, the location of the swelling, and any potential bruising, your course of treatment may vary.  If you are unsure as to the severity of the sprain, are in severe pain, or you’re not sure how to handle the injury, I recommend that you seek competent advice from a medical doctor, physical therapist, or athletic trainer.

Assuming you don’t have a more serious injury, the initial course of treatment following the sprain includes RICE, which stands for Rest, Ice, Compression, and Elevation.

  • Rest – In this case, rest would indicate not using the ankle. I would initially recommend using a crutch or crutches to either fully unweight the ankle (or at least take some pressure off) when walking.
  • Ice – Apply ice to the ankle, and the sooner, the better. The rule for icing is to apply ice no more than twenty minutes per hour. Do not place the ice directly against the skin, especially if you are using a gel pack style. Individuals with poor circulation or impaired sensation should take particular care when icing. A bag of frozen peas can be ideal.
  • Compression – Compression helps prevent and decrease swelling. Swelling can cause increased pain and slow the healing response, so limit it as much as possible. You can utilize a common ACE wrap or you can purchase a pair of mild over-the-counter compression socks. If you have a friend who is medically trained, many different taping techniques can also assist in decreasing swelling. Many physical therapists or athletic trainers can apply Kinesiology Tape or MummyTape (http://amzn.to/UA75bT) for you or you can find application techniques online.
  • Elevation – Elevate means to keep the ankle above the level of the heart. This allows for gravity to assist in keeping the inflammation and swelling down. Typically, I would combine the ice with compression and elevation.

Gentle Movement

During the acute phase, move the ankle as much as you can tolerate.  I would not be aggressive with the movement.  I would not move the ankle if it caused more than a mild to moderate increase in pain.  This may irritate the injury and cause more swelling and inflammation.  Movement is good and helpful unless it’s causing extreme pain.  Focus on the up and down movement of the ankle (known as plantarflexion and dorsiflexion), NOT on the side to side motion (known as inversion and eversion).

Possible Supplementation

During the acute phase, I recommend starting at least a thirty day course of Capra Flex by Mt. Capra (http://amzn.to/1pF936I).  Capra Flex is an organic glucosamine and chondroitin supplement which also includes an herbal and spice formulation designed to naturally decrease inflammation and support healing.  I recommend it to anyone recovering from an injury or attempting to prevent injury when performing at a very high level. I personally use it, and in my practice, it has helped clients recover faster and prevent injury. It can interfere with some blood thinning medication, so if you are on this type of medication, please check with your physician.

The initial acute phase of an ankle sprain can last one to seven days on average.  Before progressing into the next phase of rehabilitation, you should be able to stand with equal weight on your feet and not have a significant increase in pain.  Once you can, it is time to progress into the intermediate phase (to be covered in Part II).

Join our growing community on Facebook by liking The Physical Therapy Advisor!  If you have a question that you would like featured in an upcoming blog post, please e-mail contact@thephysicaltherapyadvisor.com.

Disclaimer:  The Physical Therapy Advisor blog is for general informational purposes only and does not constitute the practice of medicine or other professional health care services, including the giving of medical advice.  No health care provider/patient relationship is formed.  The use of information on this blog or materials linked from this blog is at your own risk.  The content of this blog is not intended to be a substitute for professional medical advice, diagnosis, or treatment.  Do not disregard, or delay in obtaining, medical advice for any medical condition you may have.  Please seek the assistance of your health care professionals for any such conditions.