As a physical therapist, I find that the most exciting part of a person’s rehabilitation is the full return to function, activity, or sport. Countless variations of exercises and activities are performed while working toward restoring the full functional use of the ankle. Concluding the three part series, the final stage in rehabilitation is centered on improving ankle and foot strength, stability, as well as addressing any balance deficits.
How rehabilitation progresses will vary greatly for each individual. Therefore, no treatment plan will be alike. For discussion purposes, I will address a generic treatment plan, which should be modified for your personal needs and activity level. In this final stage of rehabilitation, you will progress to normal daily activities, including any athletic endeavors. This is also when you work toward limiting any future re-occurrence of the sprain.
At this stage in recovering from a lateral ankle sprain, you should be walking relatively normally and mostly pain-free. Running and more active side-to-side movements likely still cause pain. Although not contra-indicated, these types of activities should be limited (unless you’re wearing a good lace up brace or are being regularly taped by a professional).
The initial portion of the rehabilitation is centered on improving ankle and foot strength, stability, as well as addressing any balance deficits. This process begins with statically based exercises and activities. Ultimately, it progresses into dynamic strength, balance, and mobility activities. How rapidly a person progresses in this phase is wildly variable. The key is to progress at your own pace. If you start experiencing increasing pain, feelings of ankle instability, and sensations that it may “roll” or sprain again, then you need to taper down your activity level. After the pain subsides, continue to focus on the activities that that didn’t cause pain or discomfort previously.
The following treatment plan includes exercises for strength and balance as well as mobility drills and full athletic simulation drills. Each category is listed in an easiest to most challenging format. You shouldn’t progress to the next exercise until the first one is mastered.
Strength
- Continue with the Ankle Resistance Exercises, but progress to a stiffer Thera-Band Exercise Band (http://amzn.to/USkOeo).
- Heel/Toe Raises – A person should be able to perform 25 heel raises in a row with only minimal fingertip assistance on a counter top. A normal amount of calf strength would be considered once you can perform 25 heel raises.
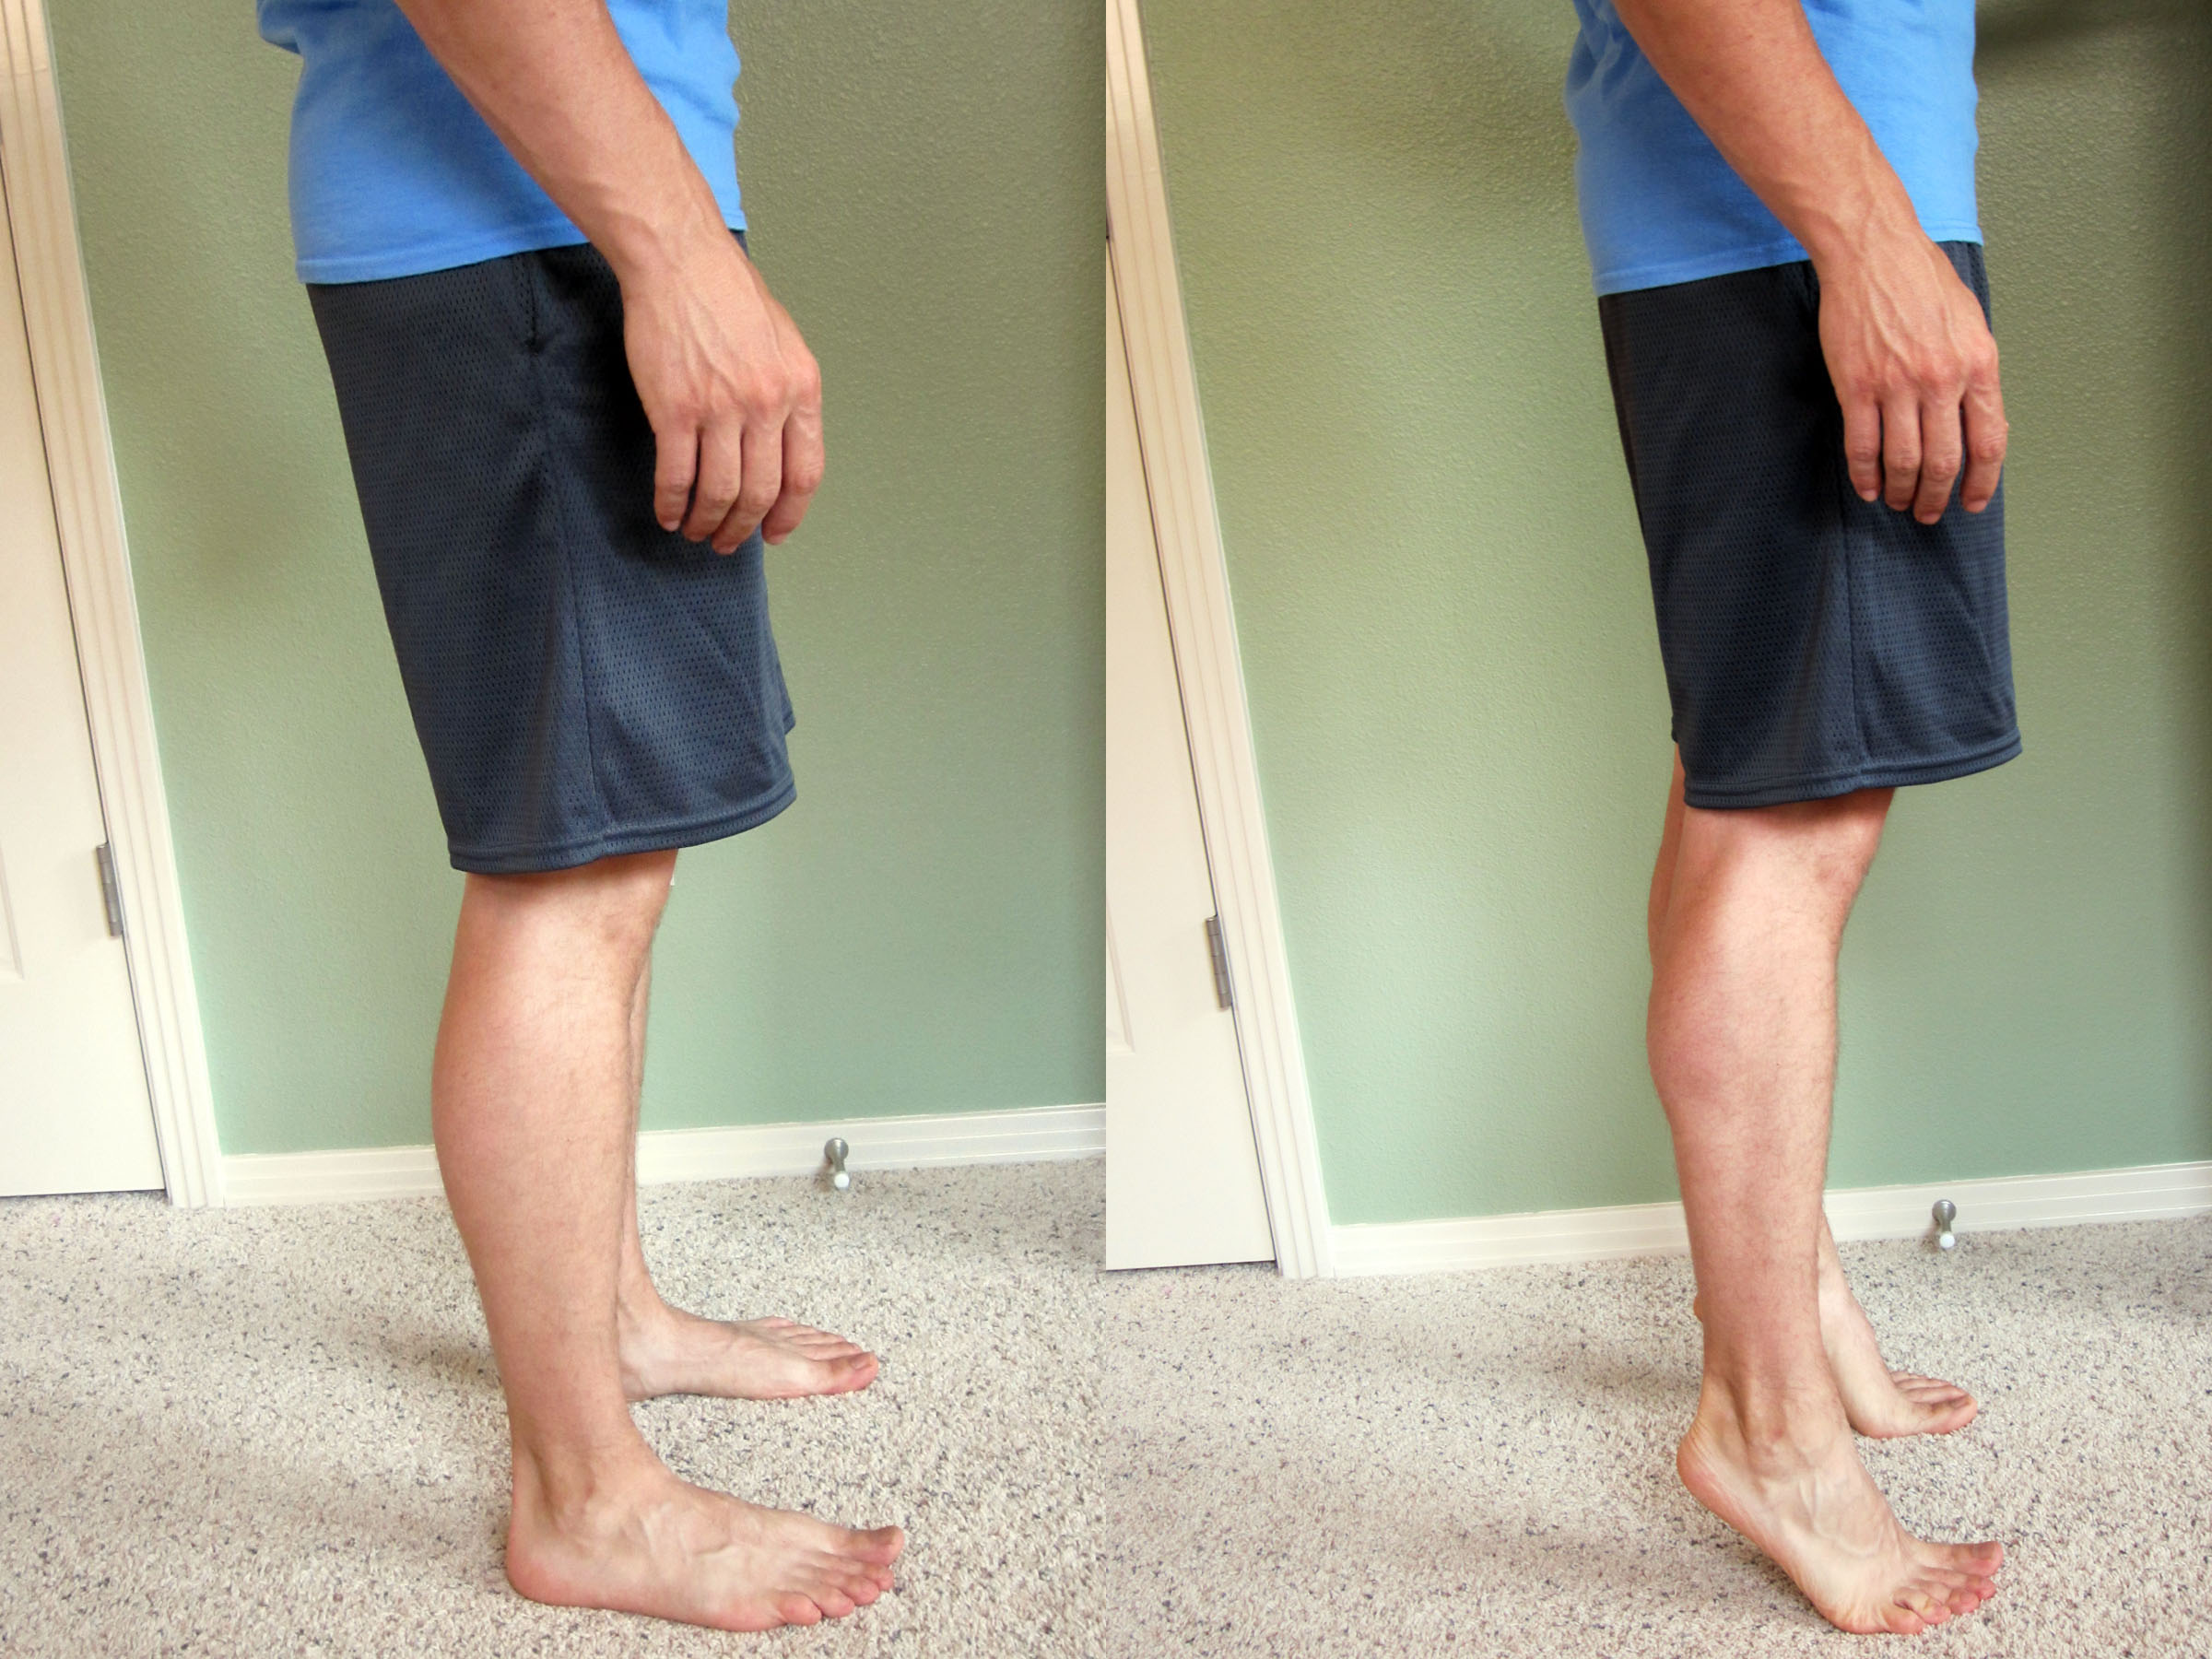
- One Leg Squat – Perform a one leg squat without using your hands for balance to increase the difficulty level. The one leg squat on your tip toes is a harder variation which involves more calf muscle activation. Start with two sets of 10 repetitions, then progress to three sets of 10 repetitions.
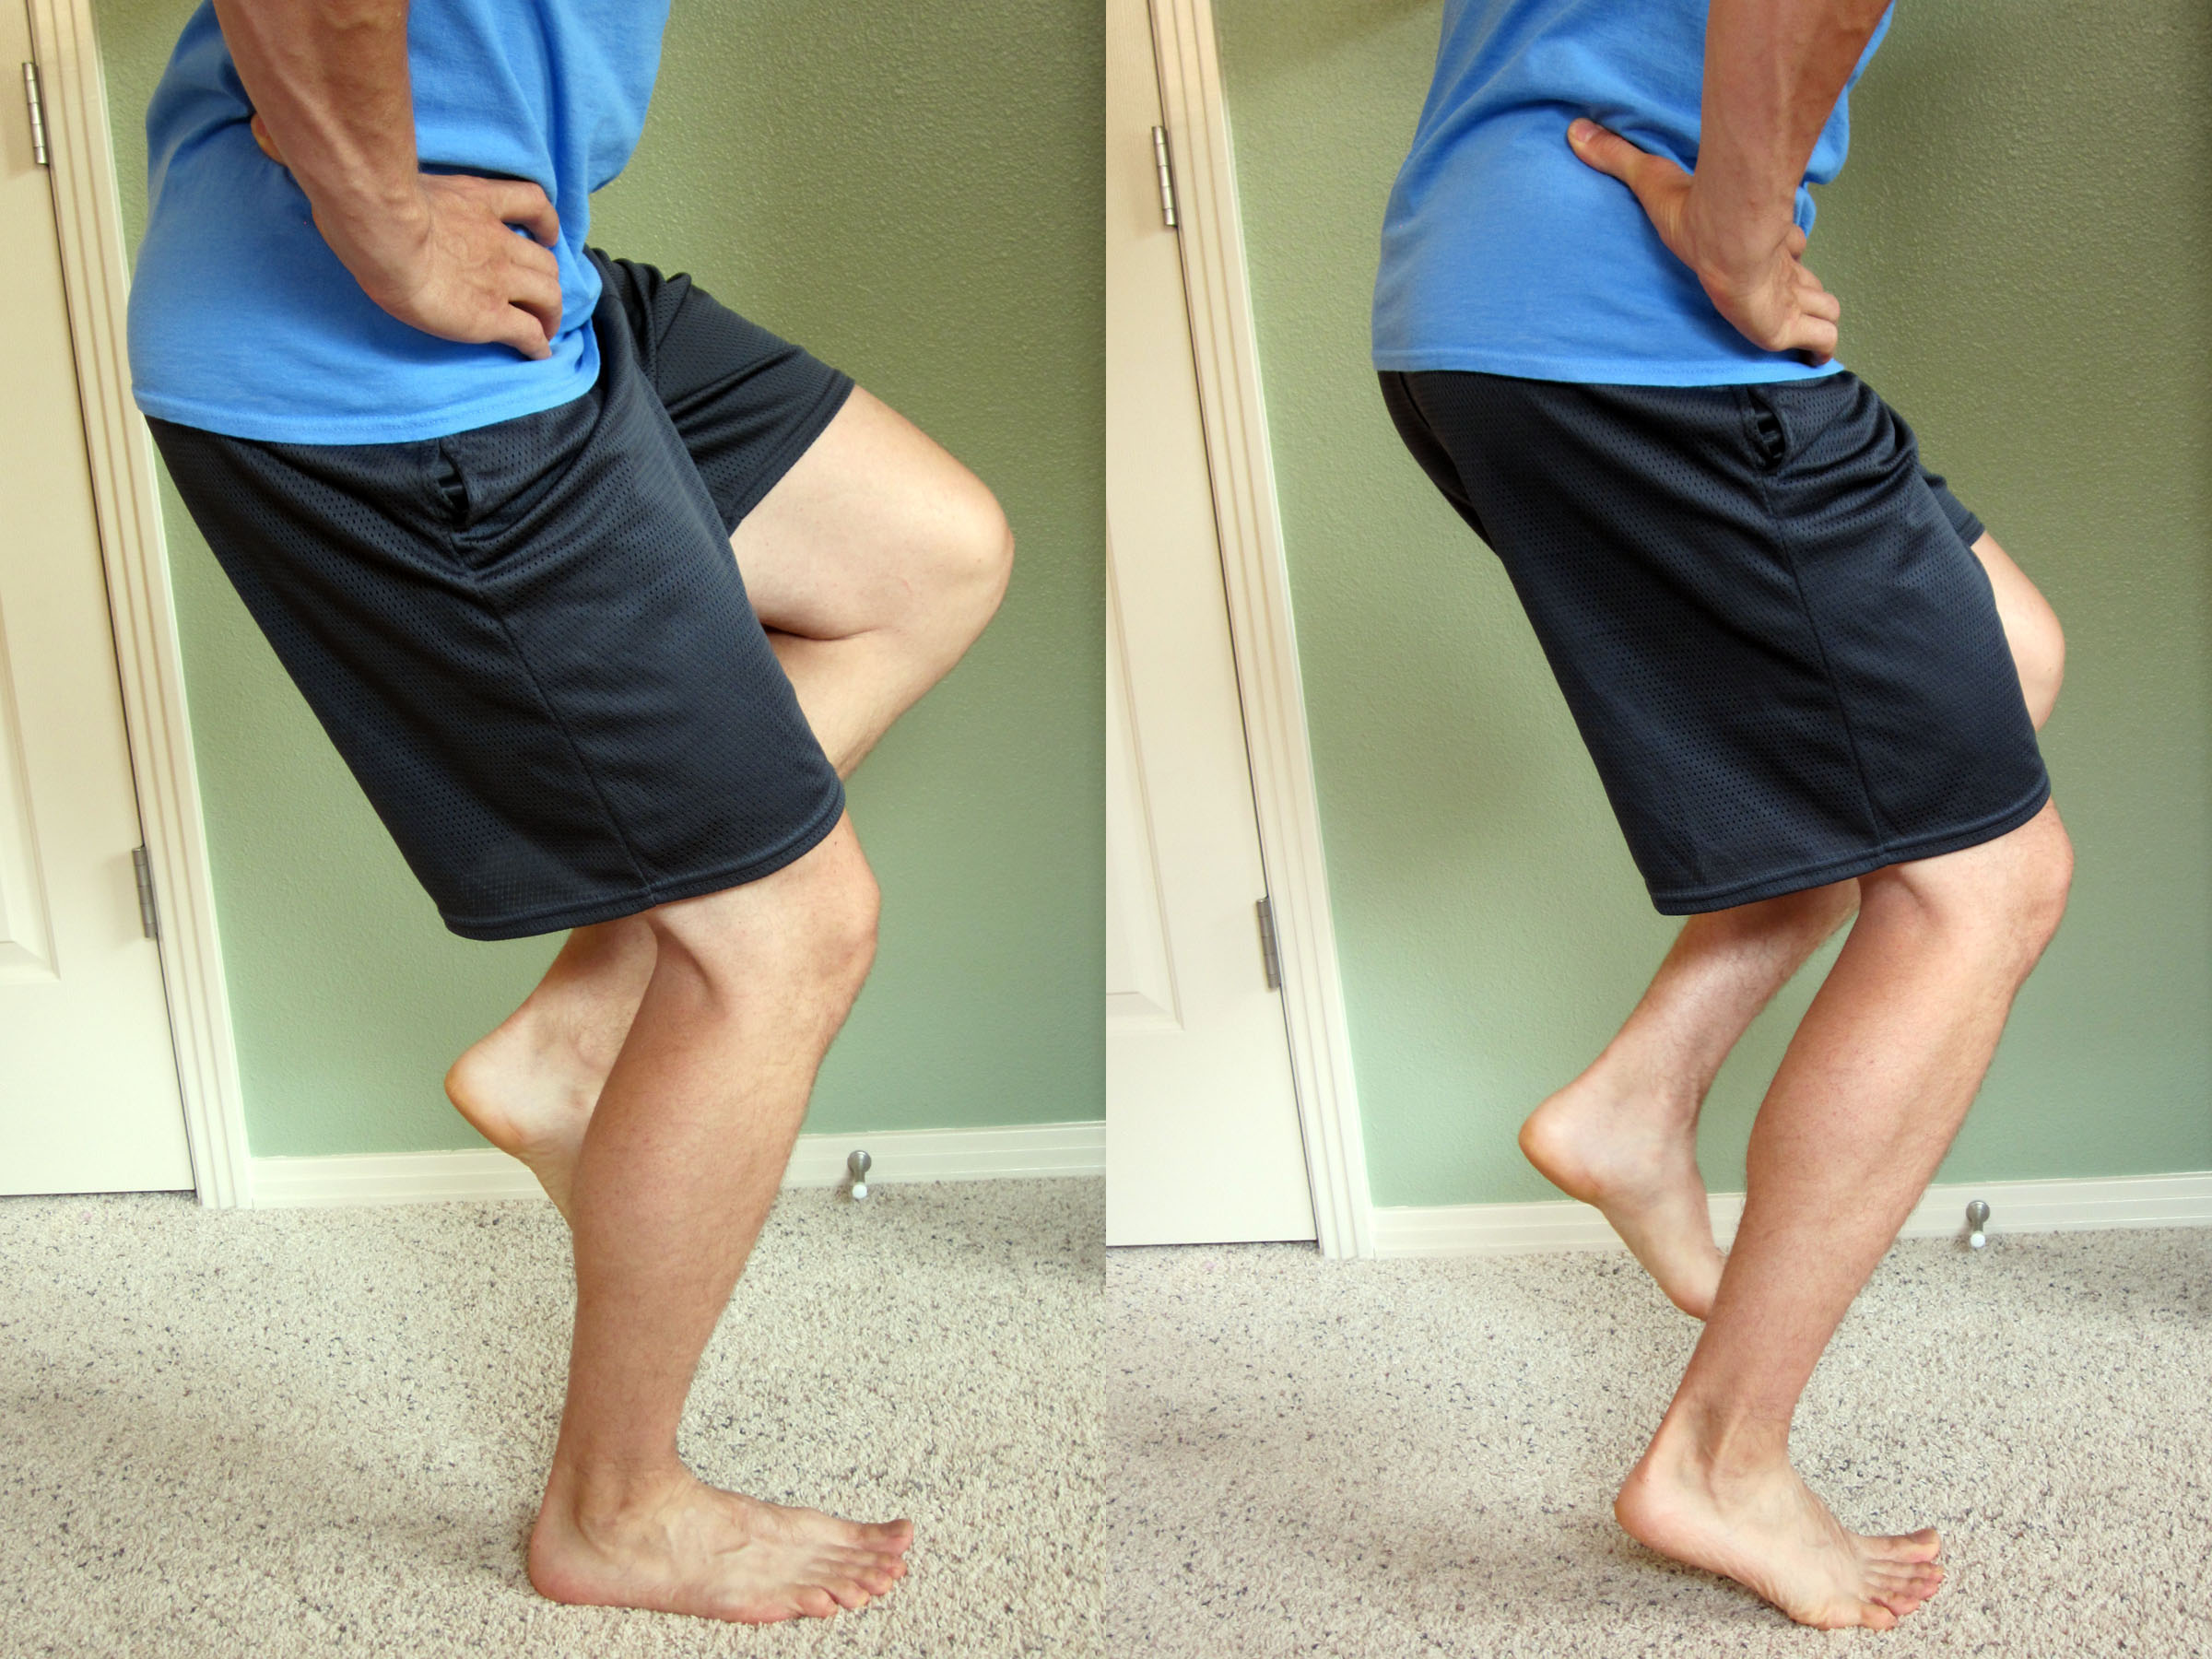
- Clock Exercise – Stand on your affected (injured) foot and attempt to touch your tip toe of the non-affected side as far out as you can reach. Bring your foot back to the center or starting point according to the hands on a clock. For example, 1 o’clock to 6 o’clock (clock-wise) or 12 ‘o clock to 6 o’ clock (counter clock-wise) depending on which foot is affected. Perform the routine between three to five times slowly.

Balance
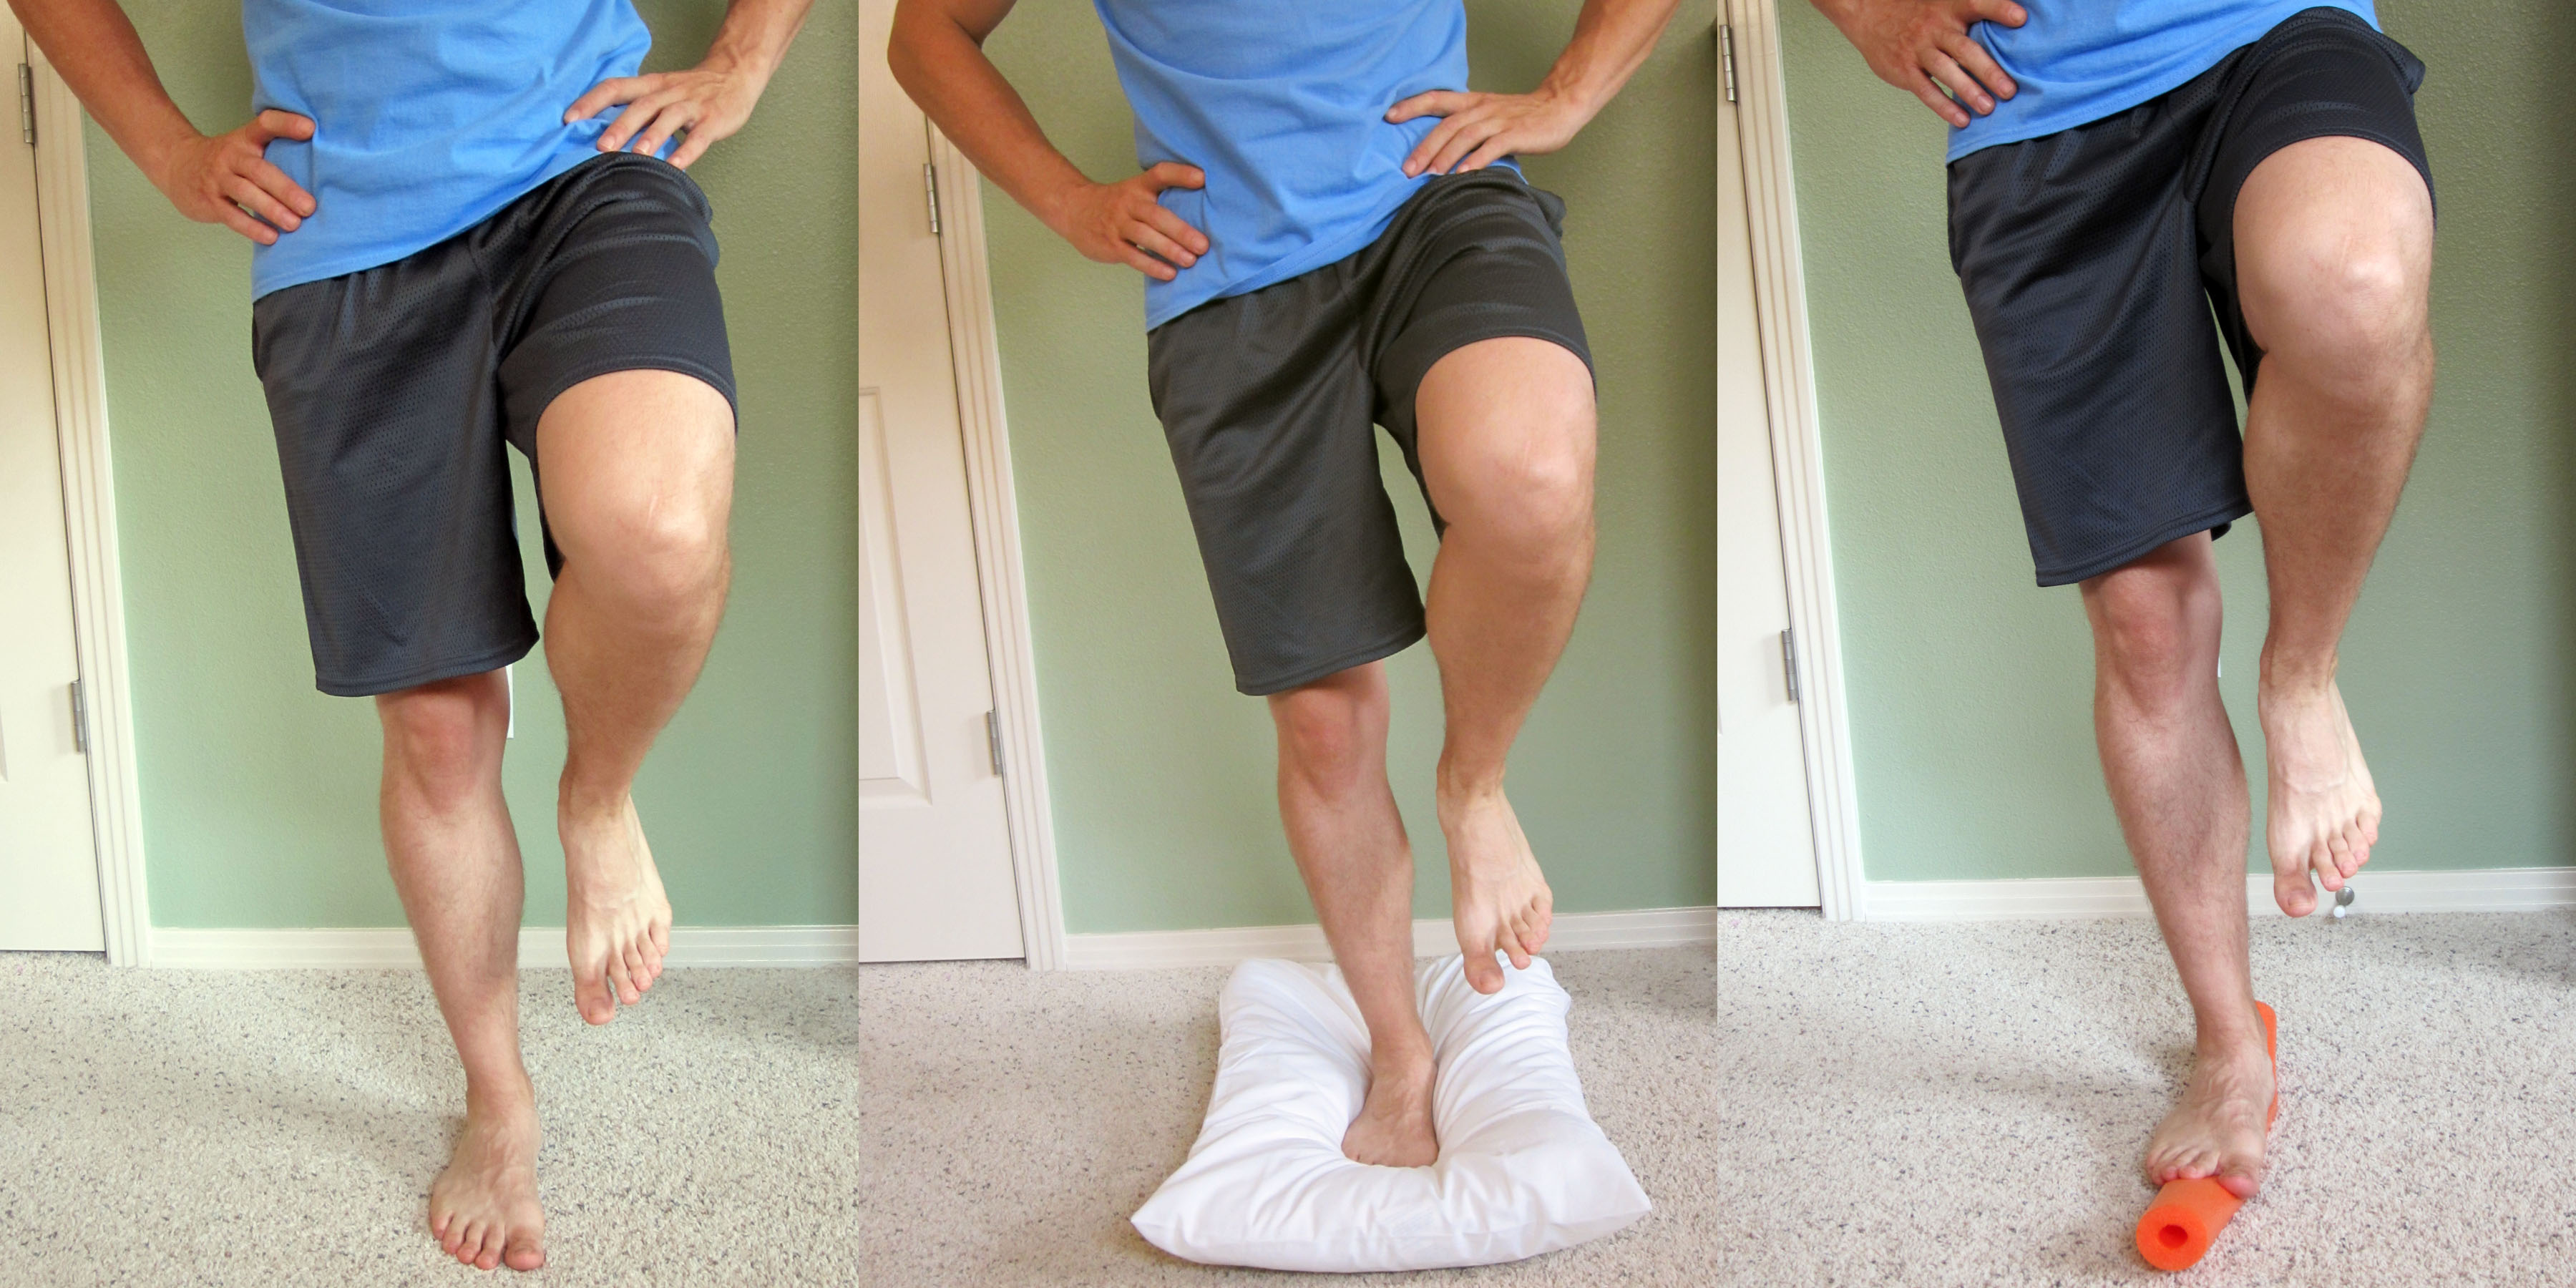
- Stand on one foot – A 30 second hold with eyes open during the first time, then closed during the second time, is considered normal.
- Stand on one foot on a pillow – A 30 second hold for two to three repetitions. As you progress, stand on the pillow and perform the Clock Exercise as described above.
- Stand on one foot on a water noodle – This exercise challenges your balance due to the softer surface and narrow water noodle. It also challenges the side-to-side stability of the ankle, which is the weakest area, yet the most critical, with a lateral ankle sprain. A 30 second hold for two to three repetitions.
- Stand on one foot and bounce a ball against a wall.
- Stand on a Wobble Board, Bosu Balance Trainer, or other unstable surface.
Mobility Drills
- Initially, start with forward and backward movements and progress from a walk, to a jog, to a sprint.
- Jump Rope
- Side Stepping – Progress the speed as pain allows and if you’re not experiencing the feeling of instability.
- Karaoke or Grapevine – Walk or run sideways while alternating the placement of the foot either in front or behind the other.
- Sprint Ladder – A number of agility drills can be performed with the sprint ladder. Search YouTube and pick your favorite video which closely mimics the footwork desired for your particular sport or activity.
- Short side-to-side Wind Sprints – While sprinting, touch your hand to the ground at each change of direction.
Full Athletic Simulation Drills
- Depending on your sport of choice, return to your sport specific training drills. You may still require additional support. I recommend wearing a good lace up brace or being taped by a professional for support. Additional support should only be used temporarily and with the intention of progressing from using them as your ankle can tolerate.
Depending on your time table for recovery and the severity of your injury, the information provided in this three part series on ankle sprains will likely be very helpful in your recovery. For some, it won’t fully meet your needs for a full and speedy recovery. Each person and injury is different. If you continue to experience pain and swelling, and/or require an accelerated time table for recovery (or return to competition), then I recommend the services of a sports medicine physical therapist or athletic trainer. Many modalities, such as electrical stimulation, manual techniques and taping methods can assist in recovery when properly utilized. To find a qualified physical therapist in your area, search at American Physical Therapy Association (APTA).
If you have additional questions or comments regarding this series, please comment below or submit your question to contact@thePhysicalTherapyAdvisor.com. Be sure to join our growing community on Facebook by liking The Physical Therapy Advisor!
Disclaimer: The Physical Therapy Advisor blog is for general informational purposes only and does not constitute the practice of medicine or other professional health care services, including the giving of medical advice. No health care provider/patient relationship is formed. The use of information on this blog or materials linked from this blog is at your own risk. The content of this blog is not intended to be a substitute for professional medical advice, diagnosis, or treatment. Do not disregard, or delay in obtaining, medical advice for any medical condition you may have. Please seek the assistance of your health care professionals for any such conditions.