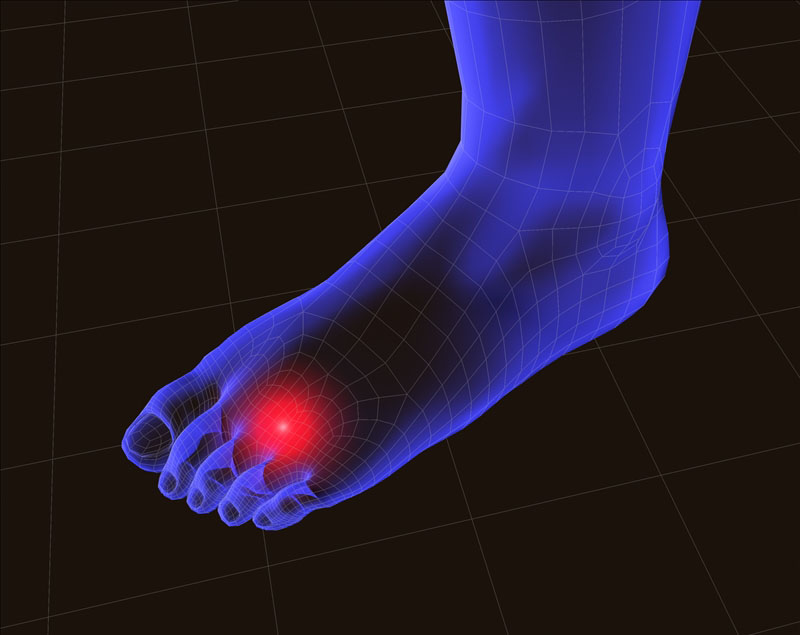
Q. I have been diagnosed with a stress fracture in my foot. What causes a stress fracture? Now what should I do? The doctor wants me to avoid any weight bearing for the next four weeks. How do I heal? –Denise
A. Thanks for your question, Denise. I’m sorry to hear that this has happened to you. Stress fractures are a unique type of bone fractures as they rarely occur due to a specific trauma. Stress fractures typically occur due to a silique of events that leads to the bone not being able to handle the stress of your activity which results in a crack in the bone. Stress fractures are common in the foot, but they can occur almost anywhere.
Initially, you might barely even notice the pain associated with a stress fracture, but the pain tends to worsen with time. The tenderness usually originates from a specific spot and decreases during rest. As the injury worsens, the pain tends to spread out and become more diffused with a focal area of tenderness. You might have swelling around the painful area. In some cases, the entire foot may begin to swell.
Stress fractures typically occur as the bone is subjected to a new unaccustomed force without enough time for recovery. Bone adapts gradually to increased loads through remodeling, a normal process that speeds up when the load on the bone increases. During remodeling, bone tissue is destroyed, and then rebuilt. This is a similar process in muscle tissue. When the load and/or volume of activity are too much for the bone, a fracture will occur.
Risk Factors for a Stress Fracture:
- Certain sports. Stress fractures are more common in people who participate in sports such as track and field, basketball, tennis, dance or gymnastics. High repetitive impact sports tend to have the most stress fractures.
- Increased activity. Stress fractures often result from increasing the amount or intensity of an activity too quickly. For example, people who suddenly shift from a sedentary lifestyle to being more active (increasing training volume significantly) or those who rapidly increase the intensity, duration or frequency of training sessions.
- Gender. Women are more likely to develop a stress fracture, especially those who have abnormal or absent menstrual periods (known as amenorrhea).
- Foot problems. People who have flat feet or high, rigid arches are more likely to develop stress fractures. Worn or poorly fitting footwear or high heels can also contribute to this issue. For runners, transitioning too quickly from a more built up running shoe into a minimalistic style can be a factor.
- Osteoporosis. Osteoporosis or osteopenia causes weakening in the bones that makes it easier for stress fractures to occur.
- Prior stress fractures. If you have experienced one or more stress fractures, you’re at a higher risk.
- Poor nutrition. Lack of Vitamin D, calcium, Vitamin K, and magnesium can make bones more likely to develop stress fractures. Generally poor eating habits are also a factor.
- Hard surfaces. Spending long periods of time or training on hard surfaces, such as concrete, can increase your risk.
- Smoking. Smoking leads to poor blood flow and affects the body’s ability to heal and recover.
- Obesity. The heavier you are, the more forces that ultimately go through your foot. Depending on how you are exercising, your particular footwear and the surface which you walk on can contribute to increasing your risk factors.
- Gait abnormalities. Alterations to your normal mobility (from either another injury or a change in your body) that affect how you typically move. The change in mobility, along with your activity level, can be enough to overload the bone. Particularly, when other risk factors are present.
In most cases, it’s not one specific risk factor that leads to the stress fracture, but a combination of risks and events that lead to the injury. Diagnosis is usually through X-ray. However, an acute injury may not initially show, so a second X-ray may be needed after a week or so to confirm the diagnosis. A bone scan can also be useful to determine if there is an injury to the bone.
In the case of a poorly healing bone, the use of a bone stimulating electrical device may be recommended by your physician.
Initial Treatment
Non-weight bearing or limited weight bearing for four to six weeks is a very common course of treatment. It provides enough time to initiate the healing response while reducing the stress on the injury site. If you continue to stress the site of injury, the fracture can worsen and require more invasive treatments (possibly even surgery). Crutches, a walker or a Roll-A-Bout knee walker can be used while you have weight bearing restrictions. A walking protective boot is also typically used to protect the injury site.
As with many injuries, the initial treatment for a stress fracture in the foot is PRICE (Protection, Rest, Ice, Compression, and Elevation).
- Protection. Wear a walking boot, and limit weight bearing on the foot.
- Rest. Limit any activities that cause pain. Depending on the severity and your personal health status, this can last from two to eight weeks. Those with diabetes usually take a significantly longer period of time to heal.
- Ice. Use ice as needed for pain and edema control. The rule for icing is to apply ice no more than twenty minutes per hour. Do not place the ice directly against the skin, especially if you are using a gel pack style. A bag of frozen peas can be ideal. Individuals with poor circulation or impaired sensation should take particular care when icing.
- Compression. If swelling is present, utilize a simple ACE wrap around the foot and ankle to help with the swelling and pain. Start at the toes, and work up the leg. Take care to not apply the ACE wrap too tightly as over squeezing the foot can be irritating.
- Elevation. Use pillows to position the foot above the level of your heart to help reduce swelling. This would be an excellent time to apply ice, too.
In general, the application of heat, cold, or over the counter (OTC) topical agents, such as Arnica Montana (an herbal rub) or Biofreeze, may help you to manage pain and stiffness.
Addressing Your Risk Factors
After you have initiated PRICE and the pain and swelling has decreased, address any risk factors (if and when possible).
Stop Smoking
If you smoke, please stop. It not only affects your bone density, but it has negative effects on every other body system. It also increases your risk of cancer and heart disease.
Nutritional Management
Address any nutritional deficits. This includes having adequate levels of Vitamin D3, Vitamin K1 and K2, magnesium, and healthy fats.
Vitamin D3 is critical to the absorption of calcium, through the intestinal wall, which is important for bone health. Although calcium is a critical component of bone health, I cannot recommend extra supplementation because of the potential cardiac risks to over supplementation. A healthy varied diet will typically supply adequate calcium levels (assuming that adequate Vitamin D3 levels are present for absorption and that you are avoiding drinking soda). Vitamin D3 is also a critical nutrient in maintaining a healthy immune system.
Research indicates that Vitamin K can help to reduce bone loss by helping the body regulate osteoclast function with in the bone. An osteoclast is a type of bone cell that breaks down bone tissue. These very important cells are integral in maintaining proper bone density and insuring an appropriate amount of calcium in the blood stream. Without adequate calcium, many critical cell functions can be affected (including heart function). Both Vitamin K1 and K2 have been proven to reduce the risk of fractures, including hip and vertebral.
Vitamin K, found in green leafy vegetables, has anti-coagulation benefits. If you take blood thinning medications, your physician will need to know how much you consume on a regular basis.
Magnesium is a critical component of bone health and health in general. Magnesium helps the body to regulate calcium levels. This has a positive effect on bone health and also has been proven to reduce the risk of kidney stones.
I also use magnesium as a sleep and recovery aid. I consume it at night to help me sleep. Magnesium can also reduce muscle soreness, cramps, and/or spasms. You can take Mag Glycinate in pill form or by eating foods higher in magnesium such as spinach, artichokes, and dates.
Most people are deficient in the amount of magnesium they consume on a regular basis. I recommend beginning with a dose of 200 mg (before bedtime) and increasing the dose in 100 mg intervals as needed. I would caution you that taking too much magnesium can lead to diarrhea. Mag Glycinate in its oral form is the most highly absorbable. Although not quite as absorbable, Thorne Research Magnesium Citrate is also a fantastic product.
If you’re female (and especially if you suffer from amenorrhea, abnormal or absent menstrual periods), then consuming adequate levels of fats is pertinent. Adequate levels of Omega-3 fatty acids and other healthy fats (primarily from plant sources such as avocados and coconut or olive oil) are critical in order to insure that your body has what it needs for proper hormonal support. Amenorrhea can be a sign that your diet is lacking in adequate high quality fats as well as a sign of overtraining.
Avoid Soda and Distilled Water
Excessive soda intake (particularly diet soda) has been linked to poor bone density. The exact cause isn’t entirely clear. Many theorize that the acidic nature of the soda along with the chemicals and additives cause increased osteoclast activity in the bones. This releases more calcium into the blood stream in order to help fight the negative effects of soda consumption. It’s clear that too much soda is bad for your health and bones. Similarly, distilled water is water that has been leached of all other nutrients and minerals. Drinking too much distilled water can leach needed nutrients out of the bones.
Weight Management
It’s important to manage your weight effectively. Excessive body weight can cause additional stress on the body. Whenever possible, work toward optimizing your health. This includes maintaining a healthy body weight. The heavier you are the more stress forces present throughout the lower extremity.
Rehabilitation
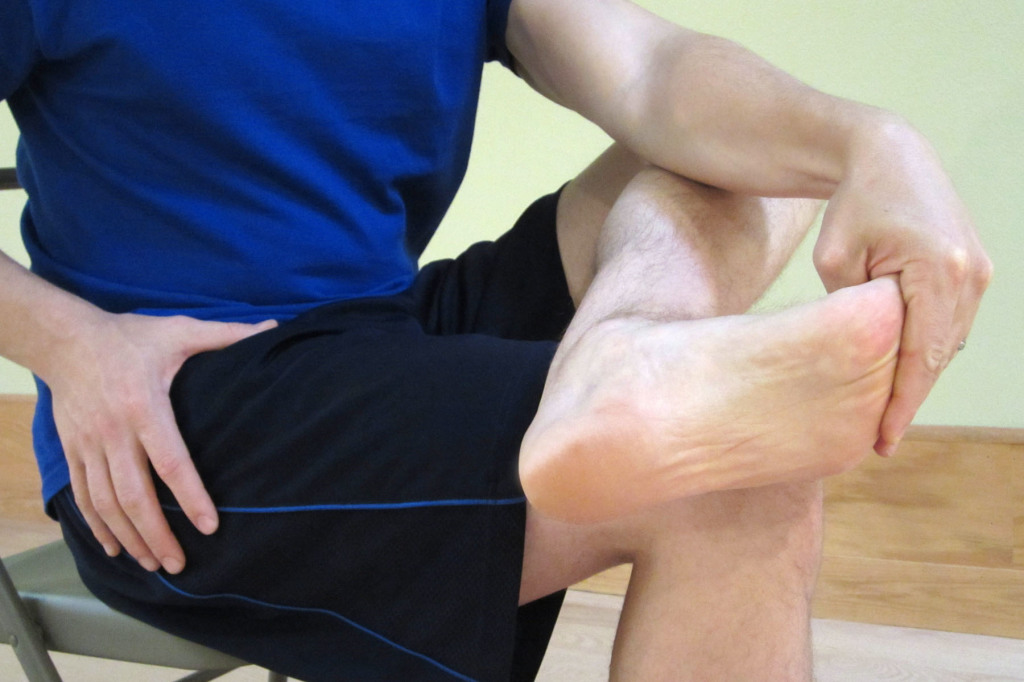
Once you’re cleared by your physician to initiate exercise and activity, it’s time to progress your rehabilitation. For detailed descriptions and photos of potential helpful exercises, please refer to Foot Stress Fracture Rehabilitation Exercises. (If you’re already working with a rehabilitation professional, such as a physical therapist, consult with him or her prior to starting my recommended rehabilitation exercises.)
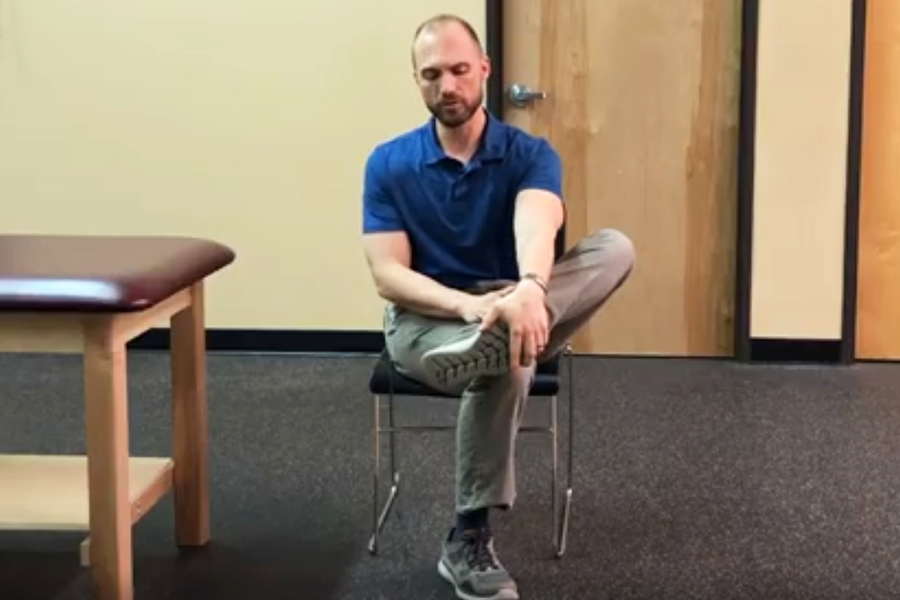
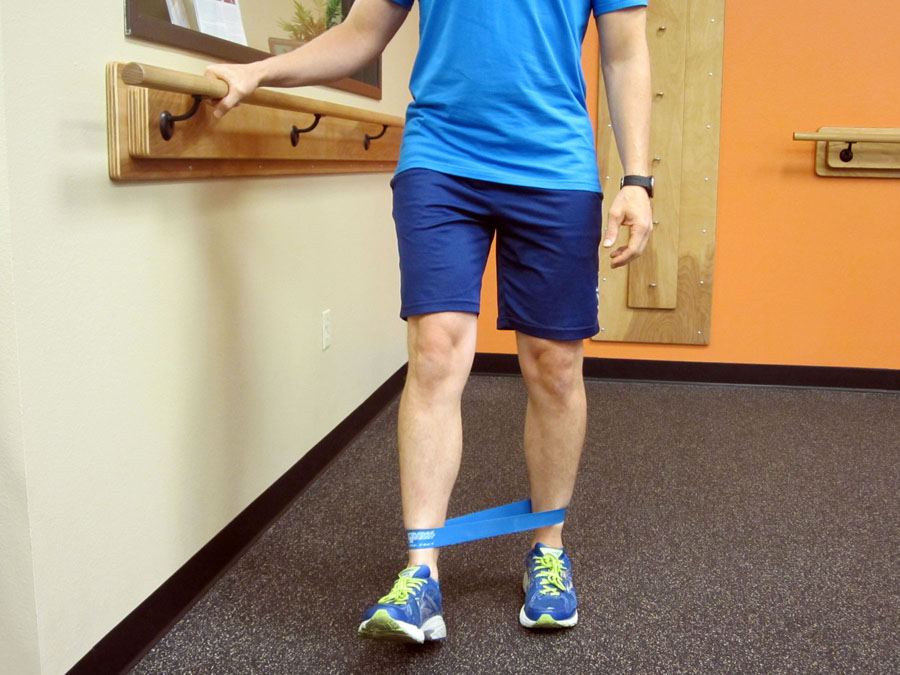
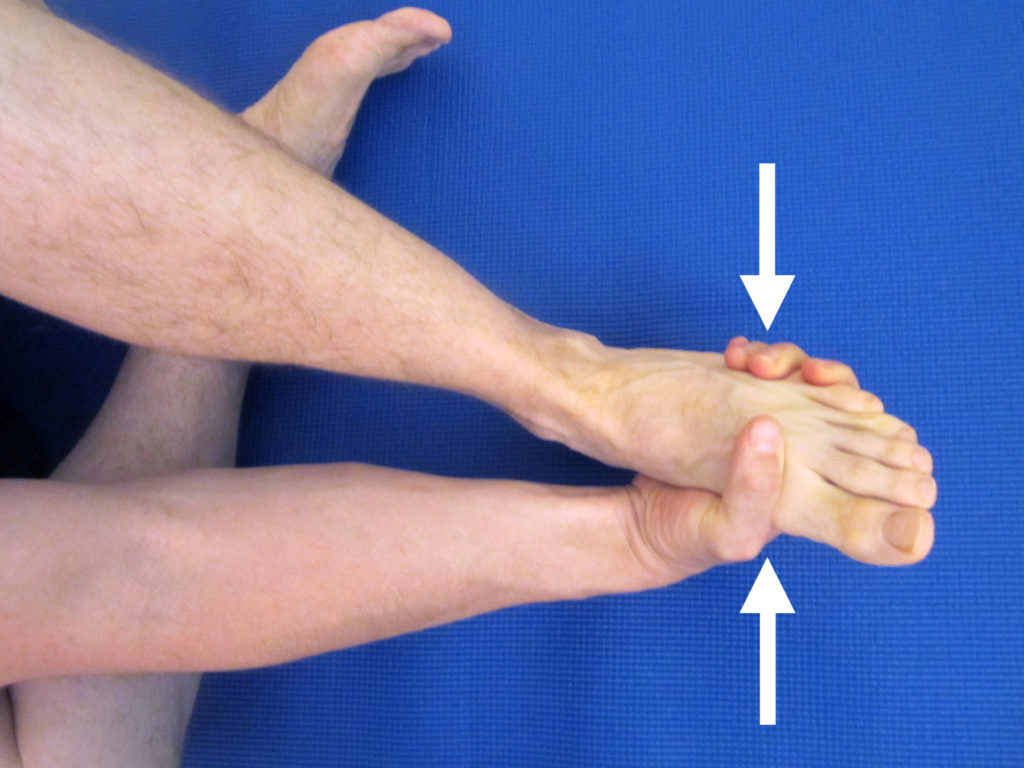
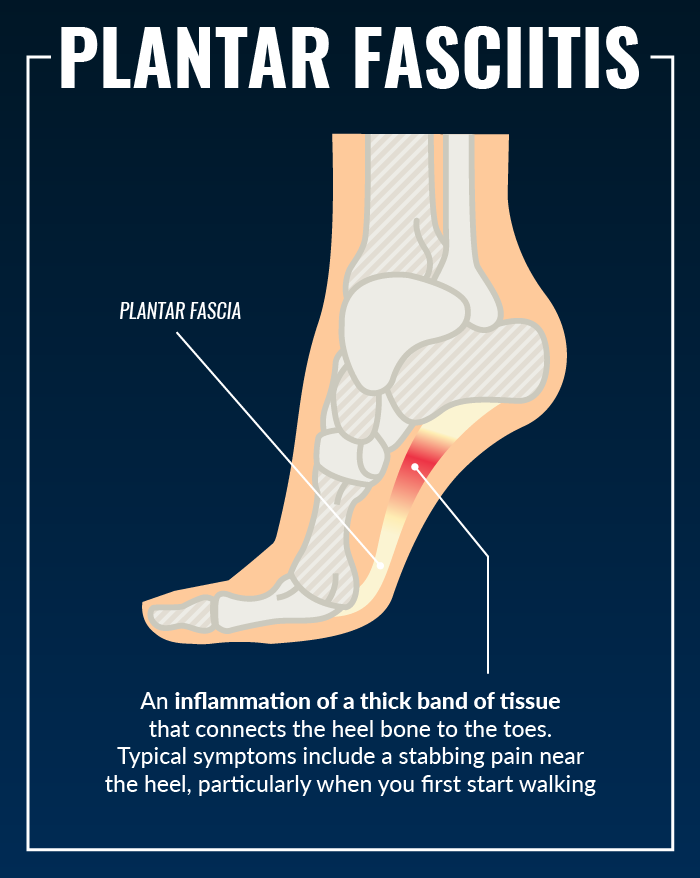
- Strengthen your foot and ankle complex. Weakness in the foot and ankle muscles (as well as the smaller foot intrinsic muscles) can lead to excessive strain on the tissues on the bottom of the foot including the plantar fascia. I recommend initiating a complete ankle/foot strengthening protocol. Please refer to Ankle Resistance Exercises Using the Elastic Exercise Band.
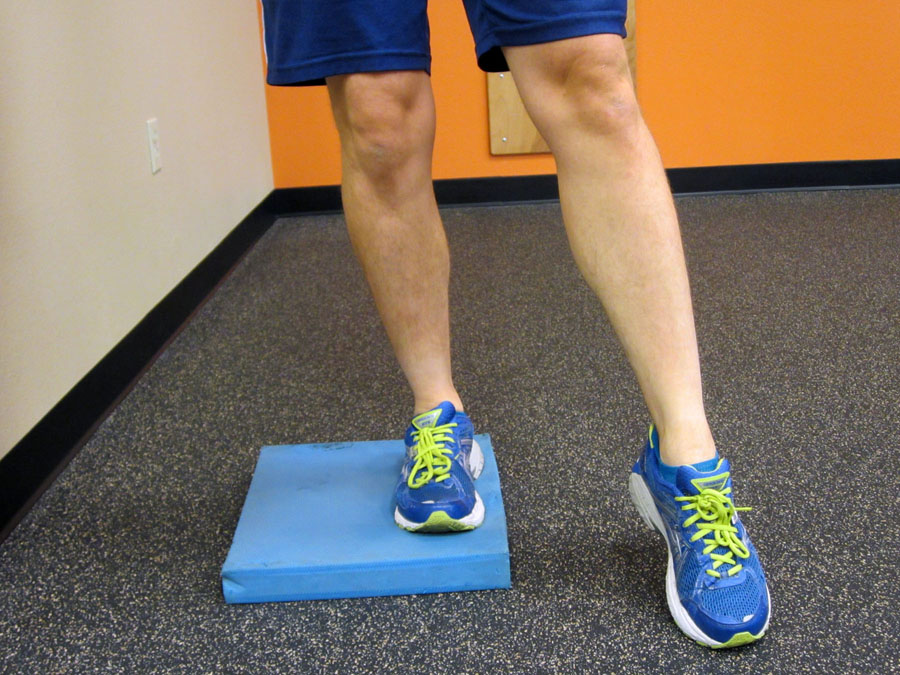
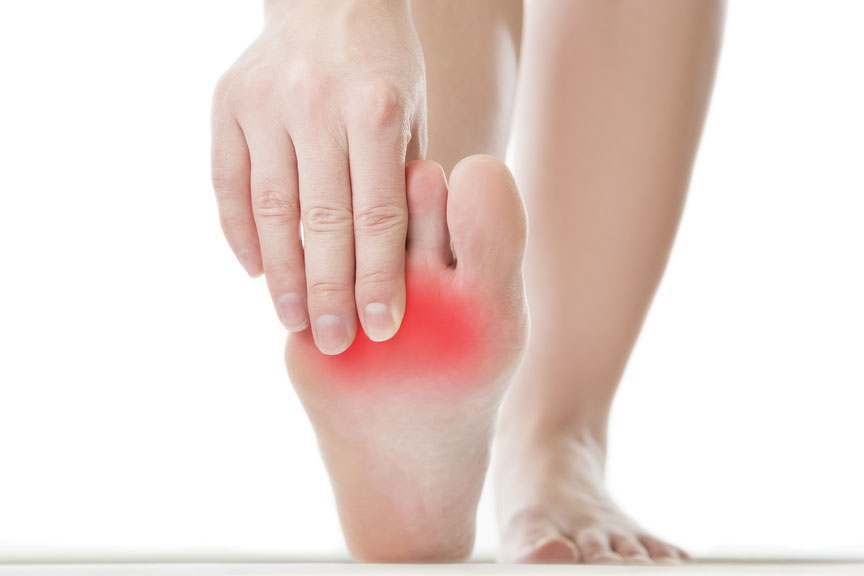
- Improve your balance. Poor balance is often associated with muscle weakness in the foot and ankle as well as weakness in the knee and hip musculature. Weakness and balance deficits can lead to poor foot mechanics, which ultimately can lead to a stress fracture or even metatarsalgia. Improving your balance can help to reduce the risk of metatarsalgia and is an important part of the rehabilitation process. For more ideas on how to improve your balance, please refer to Improving Balance by Using a Water Noodle. As your pain level improves, I recommend that you perform these balance exercises without shoes on.
- Add an orthotic. Often times, the stress fracture occurred due to alterations in foot mechanics or an old or poorly fitting shoe or orthotic. If you are recovering from a stress fracture, consult with a podiatrist or a physical therapist that specializes in orthotics to determine the proper orthotic or shoe for you.
- Did you progress too quickly into a minimalistic shoe? The standard built up shoe offers more foot support and padding than most minimalistic style shoes. If you attempted a quick progression, this may have contributed to the injury. Unless you are a child or teenager, expect a safe transition to take at least three months. A slow transition will allow your body to adequately adapt to the new stresses.
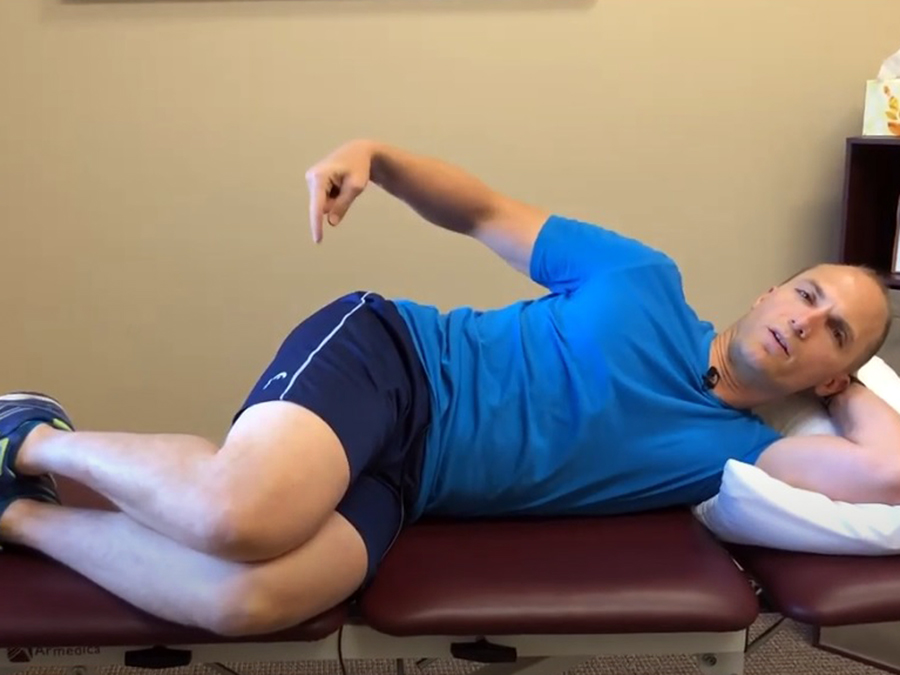
- Weight training. Once you’re cleared by your physician, initiating or returning to a weight training program is critical to the development and maintenance of strong bones. Weight training (particularly barbell training) loads the skeleton progressively over time, which can decrease bone loss and increase bone mineral density. It also positively affects the hormones, such as human growth hormone (HGH) and testosterone, needed to improve bone density and muscle strength. Barbell training is the most effective method due to the progressive load on the skeletal system, and the muscle pull being exerted on the bone, which also stimulates bone formation. The key to maintaining and improving bone density is always progressive axial skeletal loading and the associated pull of muscles against the bone during activity (particularly, strenuous activity). Examples of such exercises include squats, lunges, and dead lifts.
It’s critical that you to slowly progress back into high impact activities. It’s equally important that you address any of these risk factors in order to help reduce the risk of re-occurrence. If you have experienced one or more stress fractures, you’re already at a higher risk. As you taper up activity, monitor for signs of swelling and pain. If symptoms occur, taper down the intensity. Continue to work in a pain free range in order to strengthen around the injury site.
If you don’t experience a significant relief as you progress into your rehabilitation, please consult your medical professional. I recommend a physical therapist that specializes in feet or who works with athletes for the treatment of stress fractures. The American Physical Therapy Association (APTA) offers a wonderful resource to help find a physical therapist in your area. You may also consider consulting with a podiatrist.
Thanks, Denise, for the question. I hope you find this information to be helpful as you manage your condition.
Have you experienced a stress fracture in your foot before? Which treatments worked the best for you? Which treatments didn’t seem to help as much? Please leave your comments below.
If you have a question that you would like featured in an upcoming blog post, please e-mail contact@thePhysicalTherapyAdvisor.com. Be sure to join our growing community on Facebook by liking The Physical Therapy Advisor!
Disclaimer: The Physical Therapy Advisor blog is for general informational purposes only and does not constitute the practice of medicine or other professional health care services, including the giving of medical advice. No health care provider/patient relationship is formed. The use of information on this blog or materials linked from this blog is at your own risk. The content of this blog is not intended to be a substitute for professional medical advice, diagnosis, or treatment. Do not disregard, or delay in obtaining, medical advice for any medical condition you may have. Please seek the assistance of your health care professionals for any such conditions.