Hip Flexor Pain and Pain in the Front of the Hip

Pain in the hip flexor or front of the hip/leg can be associated with several possible causes.  When you experience pain in the front of the hip, and it doesn’t have an obvious mechanism of injury (such as tripping in a hole when running), then it’s almost always a repetitive motion injury or related to poor posture and/or biomechanics.

The location of pain in the hip flexor region can range from mid-thigh to the groin area to the lower stomach (from the belly button to the PSIS, which is the posterior superior iliac spine) or the front of the pelvic bone just up and lateral to the groin area where the primary hip flexor (psoas) originates.

Common potential reasons for pain in the front of the hip include:

  1. Femoral Stress Fracture
  2. Hernia
  3. Femoral Acetabular Impingement (FAI)
  4. Groin Muscle Strain
  5. Low Back Pain (LBP)
  6. Hip Flexor Strain

I will cover each one of these in more detail.

There are many common reasons to develop pain in or around the hip flexors.  Often the cause for the pain is nearly identical (overuse).  It’s important to get the proper diagnosis to insure that you’re treating the right structures.  Continue Reading

How to Use the Clamshell Hip Exercise to Treat Knee Pain

Knee pain is the most common running related injury.  There are many different causes of knee pain including: Patellar Femoral Pain Syndrome (PFPS); Iliotibial Band pain (IT Band); Patellar Tendinitis; and meniscus injuries.

The root cause of many of the most common knee related issues is hip weakness.  The hip abductors and hip external (lateral) rotators are very important for knee control and stability.  When weakness is present in these groups of muscles, pain is often felt down the kinetic chain (particularly, in the knee).

One of the best ways to treat many common running aches and pains is to focus on strengthening these muscles which include the gluteus medius, the tensor fascia latae, and the other deep hip rotators.

In this video, I demonstrate how to perform the clamshell exercise.  It’s an excellent non-weight bearing exercise to work on hip rotator strength which will directly affect knee stability.  In the video, I use a red exercise band.  As you progress, you could transition to a thicker band to increase the resistance and difficulty of the exercise.

Looking for more comprehensive information on how to self-treat and prevent the most common running related injuries?  I have teamed up with Angie Spencer (RN and Certified Running Coach) and Trevor Spencer (co-host of the Marathon Training Academy Podcast) to give you the tools to become a Resilient Runner.

In the Resilient Runner program, we explain injury prevention strategies to keep you running.  We provide detailed videos and rehabilitation guides on how to effectively SELF-TREAT each problem area of the body including:

  • Lower Back Pain and Piriformis
  • Hip: Hip Bursitis and Hip Flexor Pain
  • Upper Leg: Iliotibial Band and Hamstring Injury
  • Knee Pain: Patellar Femoral Pain Syndrome (Runner’s Knee); Patellar Tendinitis; and Meniscus Injury
  • Lower Leg and Foot: Achilles Tendinitis; Plantar Fasciitis; Posterior Tibial Tendon Dysfunction; Shin Splints; and Stress Fractures

The Resilient Runner program is designed to help YOU meet YOUR training goals by insuring you have the tools to avoid injury, recover quickly, and train at a peak level.

It’s a virtual library of self-treatment protocols including downloadable podcasts, videos, and .pdf files of rehabilitation guides.  It also includes a 320 page eBook, The Resilient Runner, Prevention and Self-Treatment Guide to Common Running Related Injuries.


Not all of us are born bullet proof, but we can all learn how to be more resilient!

I WANT TO BE RESILIENT!

9 Tips to Self-Treat Hip Bursitis (Side of the Hip Pain)

Pain in the lateral (outside) of the hip or leg can be associated with a condition known as hip bursitis or trochanteric bursitis.  This condition is almost always a repetitive motion injury, but it could also be initially caused by direct trauma.  In the case of a runner, the condition is most likely a repetitive overuse injury.

As an overuse injury, hip bursitis is caused by repetitive friction over the greater trochanter of the hip bone (which ultimately leads to pain).  This excessive friction is almost always due to faulty biomechanics.  In this case, it’s faulty running mechanics.

The greater trochanter is a portion of the femur (leg bone) that is easily felt.  It’s the harder portion of the hip bone on the side of the hip.  A bursa is a fluid-filled sac that is around and near boney areas and tendons areas where there is the potential for the tendon to rub or have friction.  The job of the bursa sac is to reduce friction by providing cushion and a viscous synovial fluid for the tendon to slide through.  This sac and/or the associated tendon can become inflamed and painful.  Continue Reading

How to get to the Root Cause of an Injury

Injury can quickly sideline any runner by causing pain, frustration, and disappointment over lost training days and unmet goals.

Injuries can be classified as accidental or as a result of overuse.

Some injuries occur due to accidents (such as tripping or falling).  Accidents are unfortunate, but mostly random.  Using common sense can help you to avoid repeating similar injuries.

Overuse or overload type injuries are preventable if you reduce your risks.  By avoiding injury, you can better train and ultimately, meet your running goals.  Continue Reading

Do I have Morton’s Neuroma in my Foot?

Do you have pain between your toes?  Does it feel like you are always standing on a pebble or have a lump in your socks between your toes?  This may be Morton’s neuroma.  A neuroma is a thickening of the tissue that surrounds the digital nerve bundle.  Morton’s neuroma is one of the most common types of neuromas and typically occurs between the third and fourth toes.

Morton’s neuromas occur due to repeated stresses, irritation, and/or pressure at the ball of the foot which affects one of the nerves that leads to the toes.  There typically isn’t any swelling, bumps or bruises with Morton’s neuroma.  Learn how to determine if you have Morton’s neuroma in your foot and how to self-treat it.

Morton’s Neuroma Symptoms include:

  • Numbness or tingling which is affecting the ball of the foot, between the toes, and/or the toes themselves.
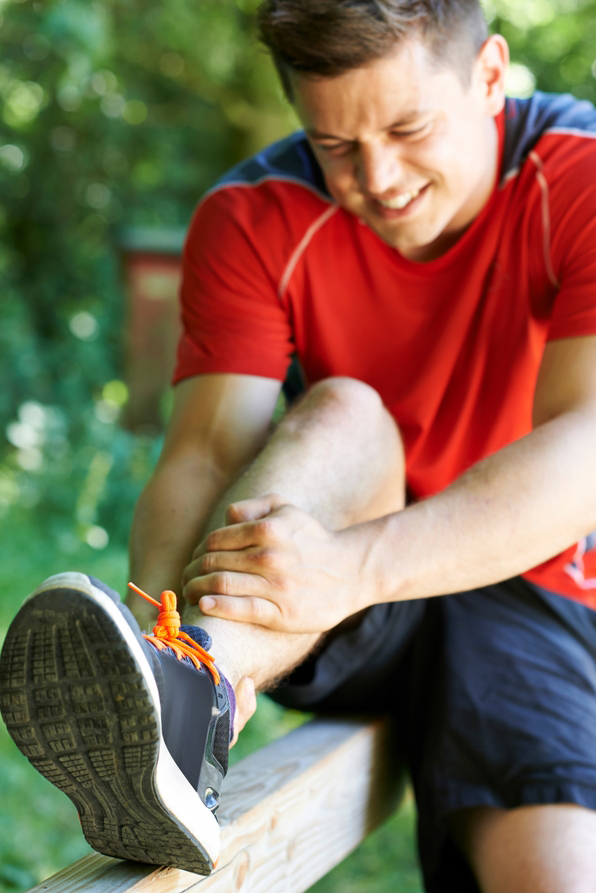
  • Sharp, stabbing and/or burning pains that are intermittent and only affect either the ball of the foot and/or toes (usually the third and fourth toes).
  • The sensation of standing on a pebble or marble or having a lump in your shoe or sock.
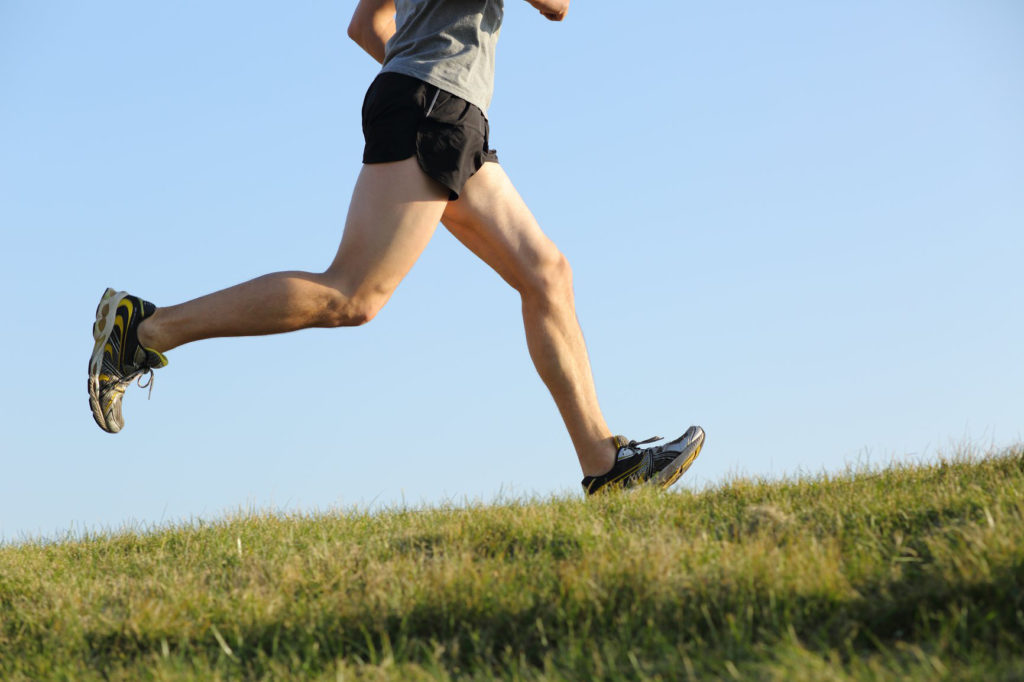
  • When running, the pain is often felt during the push off from the toes prior to the swing through phase.

Common Risk Factors for developing Morton’s Neuroma:

  • Sports and activities that involve repeated impact affecting the feet (such as jogging and running sports).
  • Poorly fitting footwear.  This is particularly true for high heel shoes, but it’s also very common in athletic and running shoes.  Most commonly, the toe box is too small.  A sole that is overly flexible in the wrong location can cause excessive give in a location which isn’t in proper alignment with the metatarsals of the foot.
  • People with common foot deformities, such as bunions, hammertoes, flat feet or overly high arches, are at risk for developing Morton’s neuroma.
  • Poor ankle mobility, particularly excessive tightness in the Achilles tendon or calf muscles.
  • Poor foot muscle strength, particularly the foot intrinsic muscles which help to support the arch of the foot.
  • Women are eight to ten times more likely to develop Morton’s neuroma.  High heels are a likely culprit.

Do I have Morton’s Neuroma in my Foot?

Morton’s neuroma is often diagnosed through a physical examination and imaging.  However, a very thorough history and physical examination can be quite conclusive.  The imaging is typically only to rule out other possible causes of the pain such a stress fracture.

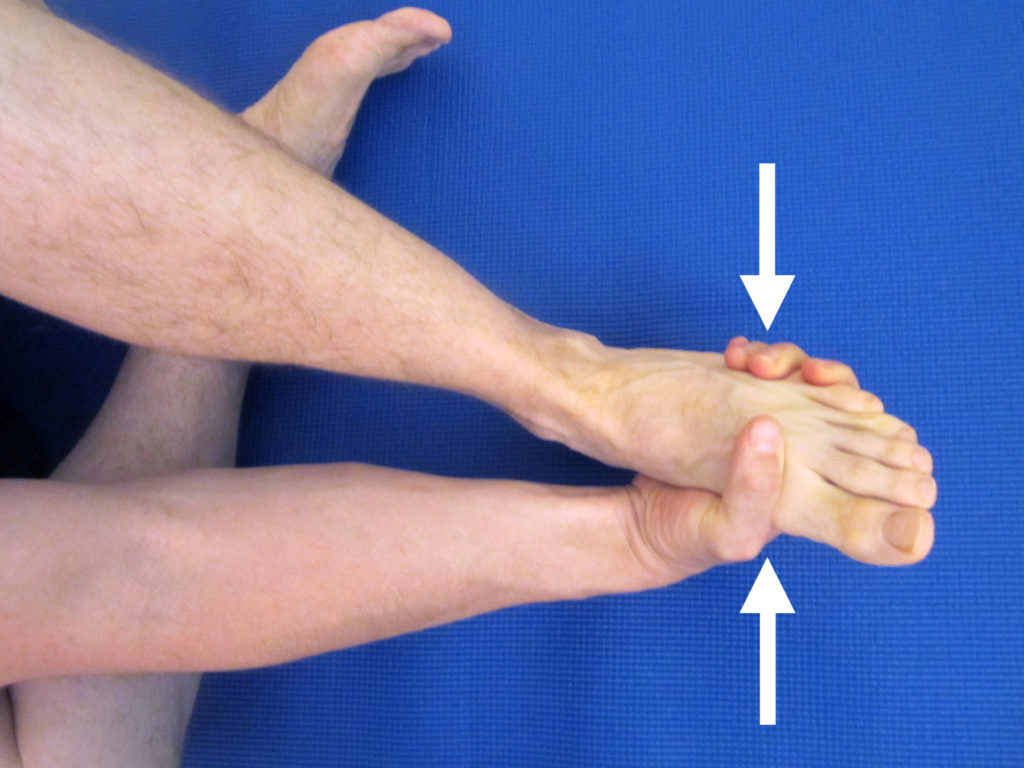
The physical examination includes palpating between the toes.  The painful area will feel “thicker” on the affected foot in comparison to the other.  There is often an associated clicking of the bones when the area is squeezed or moved back and forth.  When the forefoot is squeezed and held for several seconds for a Morton’s Neuroma test, it will often reproduce or worsen the symptoms of burning and or tingling.

How to Self-Treat Morton’s Neuroma:

Avoid wearing tight fitting, ill-fitting, and high heeled shoes.  Be sure that your shoes have an appropriately sized toe box.  In the case of athletic shoes (particularly, for distance running), extra room in the toe box can be beneficial as the foot will often swell during the course of the run.  If you wear high heeled shoes, consider wearing them less frequently and/or switching to a shorter heel.  Even wearing socks that are too small can potentially cause too much compression and lead to increased symptoms.

Orthotics.  Many people respond well to a rigid orthotic with an extension underneath the first metatarsal bone.  You may not necessary need custom orthotics.  Many running stores sell an over-the-counter orthotic such as Superfeet Blue Premium Insoles.  The blue tends to fit most feet, but a variety of options are available for customization.  In my experience, these insoles can last 1,000 to 1,500 miles easily.  If the over-the-counter options aren’t helping you, please see a physical therapist or podiatrist for custom orthotics.  Seek assistance from a professional who is a runner and has experience with treating other runners.

Metatarsal buttons and pads.  Adding a metatarsal button or pad may be enough to spread out the metatarsal heads and alleviate the pain for those who don’t want a full orthotic.  Although often a metatarsal pad may be incorporated into a custom orthotic.  I recommend these Pro-Tec Athletics Metatarsal Pads.

Anti-inflammatories.  Initially an anti-inflammatory may be necessary.  Speak to your physician about the best type of anti-inflammatory for you.  In severe cases, a cortisone injection may also be warranted.  However, you must address the biomechanical causes for the pain in order to prevent it from recurring.

I am a supporter of natural supplements and remedies.  Many supplements include herbs which are designed to help reduce inflammation and support the healing response. 

My most recommended supplement to help recover from injury is Mt. Capra CapraFlex.  Essentially, it combines an organic glucosamine and chondroitin supplement with other natural herbs which are designed to reduce inflammation and support healing.  CapraFlex can be taken long term or intermittently.

Phenocane Natural Pain Management combines the following: Curcumin, an herb that reduces pain and inflammation; boswellia, a natural COX2 inhibitor that also reduces pain and inflammation; DLPA, an amino acid that helps to increase and uphold serotonin levels in the brain; and nattokinase, an enzyme that assists with blood clotting and reduces pain and inflammation.

Another supplement I frequently recommend to help recover from injury is Tissue Rejuvenator by Hammer Nutrition.  It contains glucosamine and chondroitin as well as a host of herbs, spices, and enzymes to help support tissues and limit inflammation.  It’s a fantastic supplement.

I recommend taking either CapraFlex OR Tissue Rejuvenator, not both concurrently.

I initially recommend trying a 30 day protocol.  If the supplements are aiding your recovery, you may choose to continue taking them for an additional 30 days.  I sometimes implement this protocol as part of a prevention strategy during times of heavy volume or high intensity training.  (Please consult with your pharmacist and/or physician prior to starting any new supplementation protocol.  Herbs could interact with some medications particularly if you are taking blood thinners.)

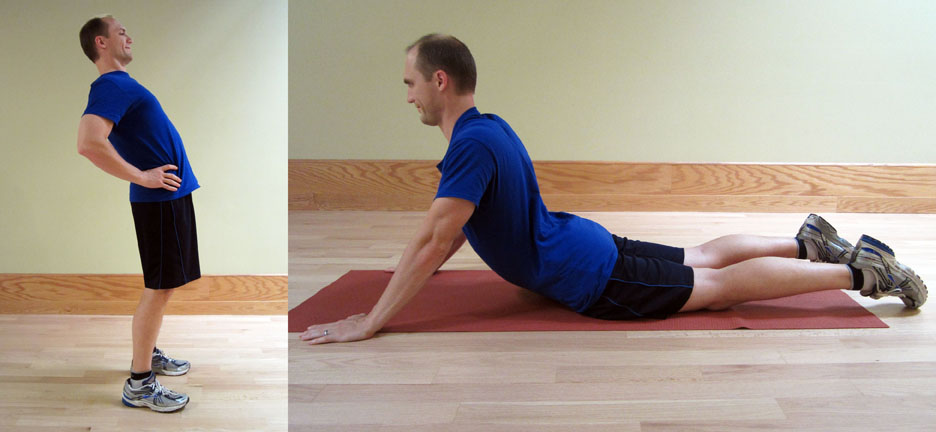
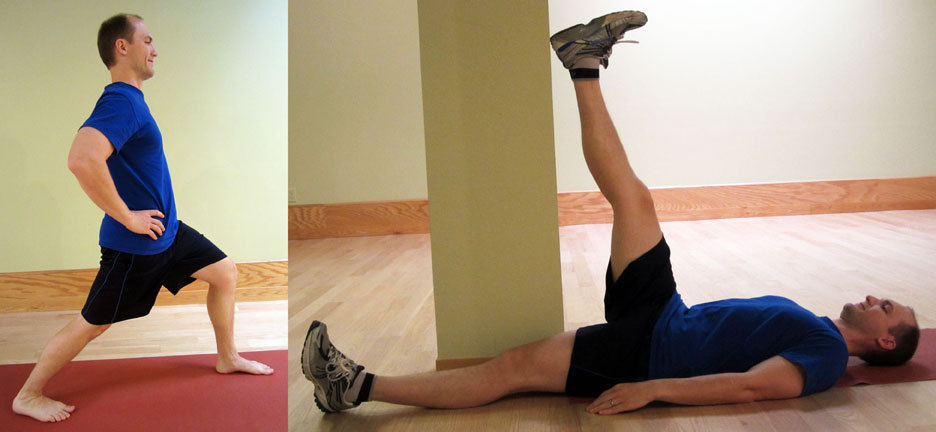
Improve your foot mobility and strength.  Complete with instructions and photos, this guide, Morton’s Neuroma Rehabilitation Exercises, outlines how to safely perform exercises in order to improve your mobility and strength.

Weakness in the foot and ankle muscles (as well as the smaller foot intrinsic muscles) is often found in the case of Morton’s neuroma as part of the biomechanical issues that led to its development.  I recommend initiating a complete ankle/foot strengthening protocol.  Please refer to Ankle Resistance Exercises Using the Elastic Exercise Band.

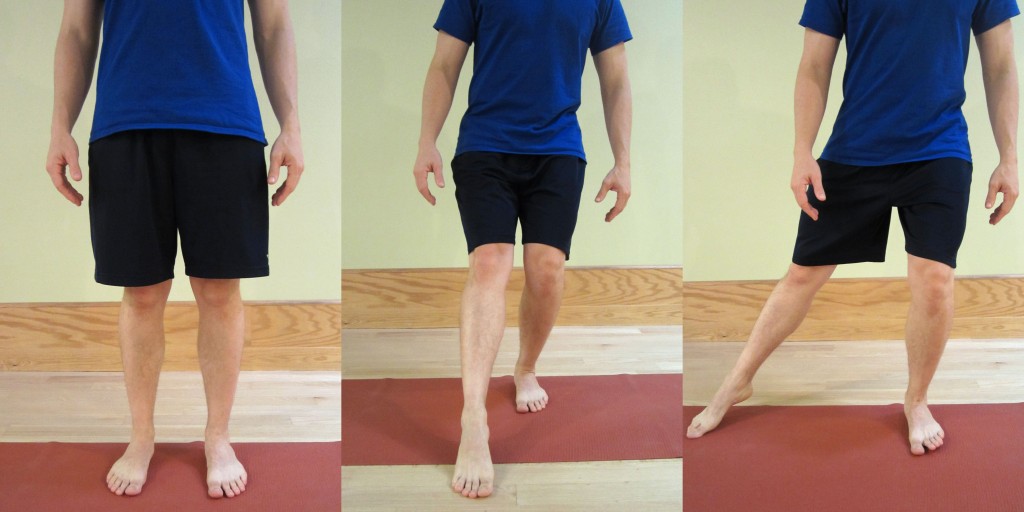
Improve your balance.  Poor balance is often associated with muscle weakness in the foot and ankle as well as the knee and hip musculature.  Weakness and balance deficits can lead to poor foot biomechanics.  Standing on one foot can be an excellent way to improve your balance.  This technique is demonstrated in the Morton’s Neuroma Rehabilitation Exercises.  For additional ideas on how to improve your balance, please refer to Improving Balance by Using a Water Noodle.

Research concludes that nearly 80% of all cases of Morton’s neuroma can be treated through conservative measures (as outlined above).  In the rare cases where conservative measures fail, then one may need to consider surgical options.

One surgical option offered is decompression surgery.  During this surgical intervention, the surgeon can relieve the pressure on the nerve by cutting nearby structures (such as the ligament that binds together some of the bones in the front of the foot).  Unfortunately, this alters the shape of the foot and may affect foot dynamics into the future.  Another option is to resect or remove the nerve.  Surgical removal of the nerve is usually successful, but the procedure can result in permanent numbness in the affected toes.

If you’re not experiencing significant relief from Morton’s neuroma upon changing your footwear and addressing other risk factors while progressing into your exercise program, please consult a medical professional.  I recommend a physical therapist that specializes in feet.  The American Physical Therapy Association offers a wonderful resource to help find a physical therapist in your area.

Has a specific treatment for Morton’s neuroma helped you?  Which treatments haven’t worked for you?  Please leave your comments below.

Looking for that exercise or book I mentioned in a post?  Forgot the name of a product or supplement that you’re interested in?  It’s all listed in the Resource Guide.  Check it out today!

If you have a question that you would like featured in an upcoming blog post, please comment below or submit your question to contact@thePhysicalTherapyAdvisor.com.  Be sure to join our growing community on Facebook by liking The Physical Therapy Advisor!

The Injury Episode!

With Special Guest Dr. Ben Shatto

http://marathontrainingacademy.com/injury-episode

Marathon Training Academy

May 11, 2017

In this podcast interview with Angie Spencer (RN and Certified Running Coach) and Trevor Spencer (co-host of the Marathon Training Academy Podcast), we discuss the prevalence of running injuries, the top mistakes we see runners make, and answer injury related questions from runners.

In this episode we talk injury prevention with our friend and physical therapy doctor Ben Shatto. Plus we answer injury related questions from real everyday runners like you. Glutes, calves, hamstrings, IT Band, foot and knee pain . . . we cover it all! Listen to the podcast

Disclaimer: This blog post and podcast are not meant to replace the advice of your doctor/health care provider, or speak to the condition of one particular person but rather give general advice.

How to Become a Resilient Runner

Why do so many people fail to reach their running and training goals?  When questioned about running, why do so many people respond with the following: “Well, I used to be a runner, but I don’t have the time or I have a bad knee.”

The two most common reasons that people fail to meet their running and training goals is lack of time and due to injury.  The painful truth is that 37-56% of runners will experience injury in a given year according to The Journal of Sports Medicine.  The number of runners who will suffer with injury during their lifetime is even higher–I’ve seen estimates as high as 80%!  These statistics even surprised me.  Yet some runners seem to be injury-proof.  How can an injury-prone runner become more resilient?

Most running related injuries are classified as repetitive motion injuries (overuse).  This is fantastic news as it means most running related injuries are preventable!  That’s why I have teamed up with Angie Spencer (RN and Certified Running Coach) and Trevor Spencer (co-host of the Marathon Training Academy Podcast) to give you the tools to become a Resilient Runner.

What is a resilient runner you might ask?  A Resilient Runner is able train consistently and effectively at a high level (even at times, taking a pounding) yet keeps on running.  You can learn to be a resilient runner, too!

How to Become a Resilient Runner

Resilient Runners Avoid Injury.

The biggest mistake is thinking I’LL WORRY ABOUT THIS WHEN I GET INJURED.  We can’t emphasize enough how important it is to start thinking about injury prevention now.  If you want to meet your current goals and run well into your older years, THEN you can’t afford to wait until you get injured!

Resilient Runners Train More.

You are bound to experience minor aches and pains associated with any exercise and athletic endeavor.  When these minor irritations are dealt with immediately, you can significantly reduce your risk of an overtraining injury.  Overuse injury is the most common reason for pain and injury associated with running.  Resilient runners know how to properly cross train to avoid common muscle imbalances and biomechanical issues that can lead to injury.  Being pre-emptive in dealing with running injuries before they become full blown will keep you running and progressing toward your goals.

Resilient Runners Recover More Quickly.

Statically speaking, most runners are likely to experience some form of injury.  Resilient runners respond quickly and correctly to their injury.  Knowing what to do and how to do it can significantly reduce the amount of time lost due to injury which equals more time doing what we all love to do…run!

Resilient Runners Save Money.

Health care costs in the United States and around the globe continue to increase often times without actual positive change in health status.  It’s imperative that we all take a leadership role in our own health care by continuing to be proactive.  In the United States, the average cash pay physical therapy visit ranges from $100-$150 per visit, and insurance co-pays can range from 50% of the visit charges to $20-$50 per visit.

With the right information available, most people can safely manage and self-treat the most common running associated musculoskeletal pains.  Even better, with the right training approach, most injuries can be prevented all together!

In the Resilient Runner program, we explain injury prevention strategies to keep you running.  We provide detailed videos and rehabilitation guides on how to effectively SELF-TREAT each problem area of the body including:

  • Lower Back Pain and Piriformis
  • Hip: Hip Bursitis and Hip Flexor Pain
  • Upper Leg: Iliotibial Band and Hamstring Injury
  • Knee Pain: Patellar Femoral Pain Syndrome (Runner’s Knee); Patellar Tendinitis; and Meniscus Injury
  • Lower Leg and Foot: Achilles Tendinitis; Plantar Fasciitis; Posterior Tibial Tendon Dysfunction; Shin Splints; and Stress Fractures

The Resilient Runner program is designed to help YOU meet YOUR training goals by insuring you have the tools to avoid injury, recover quickly, and train at a peak level.

It’s a virtual library of self-treatment protocols including downloadable podcasts, videos, and .pdf files of rehabilitation guides.  It also includes a 320 page eBook, The Resilient Runner, Prevention and Self-Treatment Guide to Common Running Related Injuries.

In addition, Angie offers in-depth advice on the following topics:

  • Preventing the most common running mistakes and mishaps from side stitches to blisters.
  • How to cope with the mental and physical aspects of injury.
  • Tips on avoiding overtraining.
  • Tips on cross training including a special 27 minutes Yoga for Runners Video.

Not all of us are born bullet proof, but we can all learn how to be more resilient!

I WANT TO BE RESILIENT!

How to Self-Treat IT Band Pain with a Mini Plunger

Pain in the lateral (outside) leg or knee is commonly associated with a condition known as Iliotibial Band Syndrome (ITBS).  (Iliotibial Band Syndrome is also known as IT Band Syndrome, ITB Syndrome, or IT Band Friction Syndrome.)  Pain can range from the lateral side of the leg up toward the hip area to just below the lateral side of the knee joint (where the head of the fibula bone begins).  The pain can be very debilitating to the point that running or hiking activities have to be stopped.  Even walking can be difficult.

Although ITBS can be very painful, it can be easily self-treated if you handle your pain and symptoms quickly.  For many years, I have taught people how to use a mini plunger as a method to provide a suction force for self-treatment.  In this video, I demonstrate how to utilize a mini plunger as a “cupping” technique to self-treat IT Band Syndrome.

Cupping is a method or technique to massage and mobilize tissues such as muscles, skin, fascia, and tendons.  The exact treatment effect is unclear, but presently the research indicates that it helps to reset neural pain receptors and stretch receptors.  Thus, reducing pain and allowing for improved movement.

Cupping has been around as a treatment technique for thousands of years.  The research on cupping is interesting and for the most part, concludes that cupping is helpful in pain management.  There are some indications that the “suction” may lead to improved blood flow to an injured area which could speed up healing times.  Other health claims of the benefits of cupping haven’t been adequately proven in current research.

Traditionally, cupping has been performed with glass cups by using a flammable paper to quickly “burn” the oxygen in the cup which causes a suction force.  There are now many types of plastic or silicon cups that can easily be purchased online.  CupEDGE Massage Tools are what I use and recommend.  Fancy cups are not necessary.  The cups can be more convenient, but even a small sink plunger will do.

Have you tried cupping to treat ITBS?  If so, what was your experience like?  Additional discussion can help others to manage this condition more effectively.  Please leave your comments below.

For more information on how to self-treat ITBS, please refer to the following:

Looking for that exercise or book I mentioned in a post?  Forgot the name of a product or supplement that you’re interested in?  It’s all listed in the Resource Guide.  Check it out today!

If you have a question that you would like featured in an upcoming blog post, please comment below or submit your question to contact@thePhysicalTherapyAdvisor.com.  Be sure to join our growing community on Facebook by liking The Physical Therapy Advisor!

5 Tips to Prevent Low Back Pain during DIY Projects

Many of us will be planning our yearly DIY (Do It Yourself) projects now that it’s nearly summer time (in the U.S.).  I have a few minor landscaping projects that will be addressed this summer, too.  Whether it is an outside landscaping project, an indoor painting project, moving furniture around, and spring cleaning (don’t forget the garage!), you are likely to be exercising different muscles and performing activities that you aren’t used to.  It’s easy to imagine the new paint color or a beautiful landscape design.  Now imagine crawling around on the floor because you can’t stand up as your best laid plans are derailed by a bad episode of low back pain (LBP).  Not exactly the picture you were hoping for!

Exhausting work in garden

Whether you are an avid exercise enthusiast, runner, CrossFitter, weekend warrior or couch potato, you are likely to experience an episode of LBP despite being young or old.  LBP is estimated to affect nearly 80% of the U.S. population at one time or another, and it’s one of the top reasons for physician visits.  Fortunately, most LBP is mechanical–meaning it’s from a physical or structural cause not related to conditions such as cancer or infections.  The problem with this type of LBP is that it usually comes back.  People who have had an episode of mechanical LBP are 90% more likely to experience it again.

If you are going to be tackling those DIY projects and desire to still be standing upright at the end of the day, it’s best to minimize your risk factors for experiencing LBP by being proactive!

5 Tips to Prevent Low Back Pain during DIY Projects:

1. Warm up.

Just like any other exercise and/or event, you should warm up first.  A good place to start is to perform standing back extensions and press-ups.

StandingBackExtensions_PressUps

2. Loosen up.

So many of us sit too much!  This causes tightness in the hip flexors and hamstrings.  Try stretching your hip flexors and hamstrings.

HipFlexors_Hamstrings

3. Limit the amount of time spent in one position (including sitting).

Don’t sit or bend over for a prolonged period of time without at least standing up straight (and preferably, performing additional standing back extensions and press-ups as well as stretching your hip flexors and hamstrings).

If you are sitting, maintain proper posture.  Whenever possible, make sure that your knees stay below your hip level and that you are able to maintain your natural lumbar curve.  A great tool to help you with this is a lumbar roll.

4. Use common sense.

If you don’t think you can comfortably lift something, be sure to ask someone for help.  Stay within your limits, and don’t over estimate those limits!  Just because you could lift 100 lbs. in high school, it doesn’t mean that you still can.  Use common sense and proper technique when lifting a heavy object or when performing repetitive lifting.

After taking a prolonged rest, be sure to spend a few minutes warming up and loosening up again.  Don’t make the mistake of sitting down and resting during your lunch break, only to launch back into the project without making sure that your back is ready.  Take the extra time to be certain that your back is ready to start working again.

5. Preventing LBP is always best.

Once you have experienced an episode of LBP, you have a 90% chance of it reoccurring.  Be proactive!  Reoccurrence rates can be impacted and reduced!

Developing adequate strength in the lumbar extensor muscles and core musculature is the primary way to prevent initial episodes and to prevent reoccurring episodes of LBP.  Research clearly indicates that the right targeted exercises are the most effective way to manage LBP.

Stay tuned in during this upcoming month as I introduce you to my new complete self-treatment package, Treating Low Back Pain during Exercise and Athletics.  I have designed a complete guide and system to help runners, CrossFitters, exercise enthusiasts, and weekend warriors just like you (and me) prevent, treat, and manage LBP so that you don’t have to waste any training days because of ineffective treatment measures.  In the meantime, be sure to check out my FREE resource, 10 Minutes per Day Low Back Pain Prevention Guide.  Download the .pdf file, which is full of photos and exercise instructions, to get started!

For additional information on LBP, please refer to the following:

Which DIY (Do It Yourself) project do you hope to accomplish this upcoming summer?  Please share below.

Be sure to join our growing community on Facebook by liking The Physical Therapy Advisor!  If you have a question that you would like featured in an upcoming blog post, please e-mail contact@thephysicaltherapyadvisor.com.

Disclaimer:  The Physical Therapy Advisor blog is for general informational purposes only and does not constitute the practice of medicine or other professional health care services, including the giving of medical advice. No health care provider/patient relationship is formed.  The use of information on this blog or materials linked from this blog is at your own risk.  The content of this blog is not intended to be a substitute for professional medical advice, diagnosis, or treatment.  Do not disregard, or delay in obtaining, medical advice for any medical condition you may have.  Please seek the assistance of your health care professionals for any such conditions.

A Barbell Knee Stability Exercise for Runners

Patellar Femoral Pain Syndrome (PFPS) is the physical therapy term for runner’s knee, a common condition experienced by runners.  It accounts for roughly 25% of all reported cases of knee pain.  PFPS is a term used to describe pain in many areas of the knee including:  pain near the insertion point of the patellar tendon, just below the patella or knee cap; pain just above the knee cap where the quadriceps muscle is blending in and forming the quadriceps/patellar tendon; and/or pain underneath the patella.

Although there are many types of knee pain, many of the potential causative factors for PFPS are similar to other conditions such as IT Band Syndrome (ITBS) and Patellar Tendinitis.  Treatments for knee pain can vary wildly from person to person.  It can be quite painful and significantly affect a person’s ability to run or move properly.  In the case of PFPS, the cause of the pain is often associated with a patellar or knee cap that is tracking in the femoral groove improperly.

Common Causes and Risk Factors for Knee Pain and specifically, Patellar Femoral Pain Syndrome (PFPS) include:

  • Poor quadriceps strength (particularly the inner/medial quadriceps).
  • Poor hip abductor and/or hip external rotator strength.
  • Improper foot biomechanics during the single leg stance phase of the gait cycle or the mid foot strike during running.

One of the primary treatments for nearly all types of knee pain (including PFPS, Patellar Tendinitis, ITBS, and meniscus injury) is to improve your quadriceps and hip strength.  Quadriceps strength is an important component to your long term management and recovery.  As part of the quadriceps strengthening protocol, I have found it useful to skew toward the inner quad, known as the vastus medialis oblique (VMO).  Although you cannot specifically isolate the VMO, I still recommend implementing exercises that are likely to activate the muscle more when performed correctly.

The other critical factor is weak hip abduction and hip external (lateral) rotation muscles, which significantly contribute to PFPS.  The purpose of the lateral and external rotators of the hip is to prevent internal rotation (rolling in) of the hip and knee.  They also provide the stability for the pelvis and lower leg when in single leg stance.  The hip muscles are critical in controlling knee stability and ultimately, patellar (knee cap) tracking.  Adequate strength of the rotators and abductors of the hip is critical.

In this video, I demonstrate how to perform an advanced exercise known as the clock or star drill.  It’s an excellent exercise to work on knee stability and balance while specifically focusing on quadriceps and hip strength.  Although I demonstrate the exercise with a barbell in the video, I recommend that you initially be perform it without weight (as demonstrated below).  As you progress, then you could add weight.

ClockExercise

Have you performed the clock or star drill before?  If so, what was your experience like?  Please leave your comments below.

For more information on how to self-treat differing types of knee pain, please refer to the following:

Looking for that exercise or book I mentioned in a post?  Forgot the name of a product or supplement that you’re interested in?  It’s all listed in the Resource Guide.  Check it out today!

If you have a question that you would like featured in an upcoming blog post, please comment below or submit your question to contact@thePhysicalTherapyAdvisor.com.  Be sure to join our growing community on Facebook by liking The Physical Therapy Advisor!